Ever felt like your weed just doesn’t hit the way it should? You’ve spent weeks nurturing your plants, adjusting the lights, checking pH levels, and giving them the best nutrients you could find. Still, the end result feels weak. The high fades too quickly, or it never quite delivers that deep, satisfying punch you expected.
That disconnect can be frustrating, especially if you're trying to level up your game. Maybe you’ve asked yourself, how can I make my weed more potent? The good news is, there’s a clear path to stronger, more powerful buds.
Potency isn't just about having a big-name strain or throwing more light on your plants. It combines genetics, technique, timing, and attention to detail. From choosing the right seeds to curing your final product, every step plays a role in how hard your weed hits.
Let’s break down how to build potency into every growth phase, from seed to smoke.
What Is Potency In Cannabis?
When you think about potency, don’t just focus on one number from a lab test. Potency is the total impact your flower delivers, from the intensity of the high to the depth of its aroma and flavor. As a grower, you’re not just chasing high THC (Tetrahydrocannabinol) percentages; you’re cultivating a powerful, full-spectrum experience.
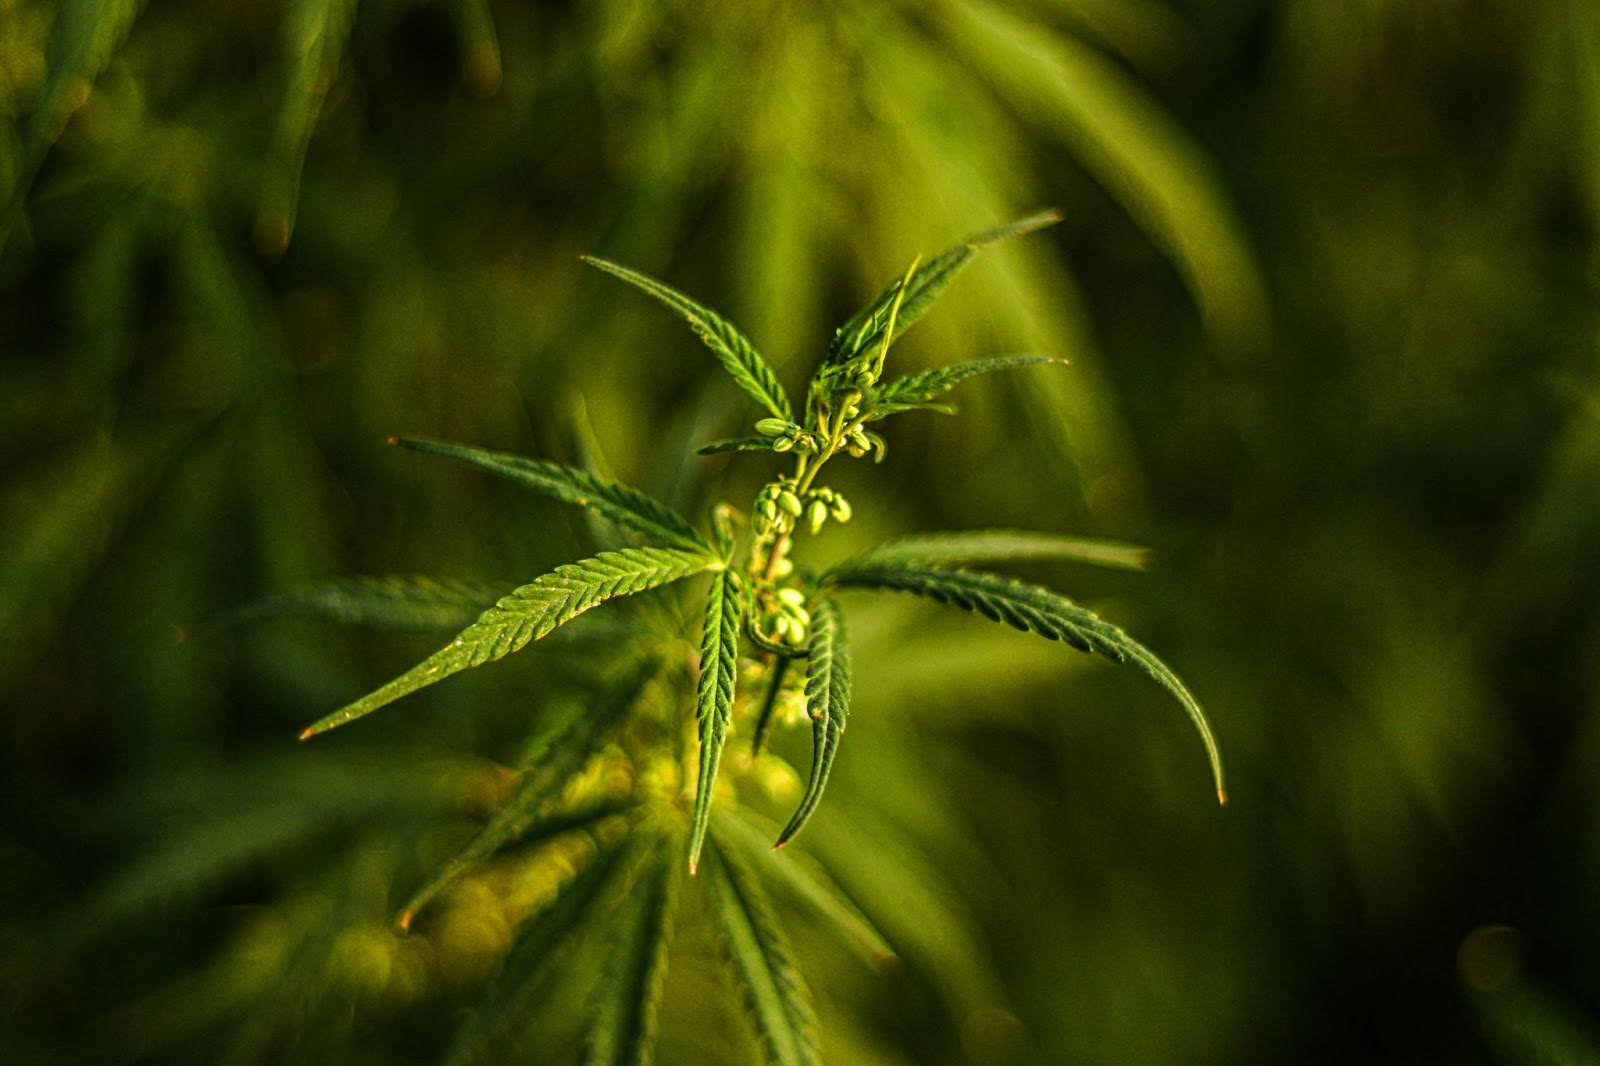
Yes, THC matters. It’s the main cannabinoid behind that euphoric, psychoactive buzz your customers or personal stash is meant to provide. But THC alone doesn’t tell the whole story. Potency is also shaped by the density and quality of trichomes, the tiny, crystal-like glands coating your buds. That’s where the cannabinoids and terpenes live, and they’re what give your flower its punch, its personality, and its staying power.
Here’s the thing: no amount of dialing in your lights, nutrients, or humidity will make up for weak genetics. If the strain doesn’t have the potential to produce high THC or rich trichomes, no grow method will magically boost its ceiling.
So, before you start tweaking your environment or adjusting your feeding schedule, take a hard look at your starting point. Are you working with strong, reliable genetics? Because potent weed starts at the source. You can refine and enhance what's there, but you can’t grow fire from average seeds or clones.
Potency begins with the plant's blueprint. Everything else builds on that foundation.
So, how do you choose the right cannabis strain that fits your growth needs? Let us understand below.
Best Tips to Increase the Potency of Cannabis Plants
To boost the potency of your cannabis plants, focus on optimizing light exposure, maintaining proper nutrient balance, and controlling environmental factors like temperature and humidity. These practices encourage robust trichome production, which enhances the plant’s cannabinoid and terpene levels for a stronger, more flavorful yield.
1. Choosing the Right Strain
Picking the right cannabis strain is one of the most important decisions you’ll make as a grower. Think of strains like specialized tools, each suited to specific goals and markets. To maximize your success, you need to choose genetics that fit your unique needs.
Here’s how to select the best strain for your grow:
- Match strains to your goals: Choose strains based on what you want, maximum potency, resin, yield, flavor, or extraction quality. For high THC and dense buds, try Bruce Banner, Godfather OG, or Gorilla Glue #4. Hybrids like Girl Scout Cookies (GSC) are great for balanced effects and broad appeal.
- Consider your environment: Indoor, outdoor, or greenhouse grows need different genetics. Pick strains suited to your conditions to avoid issues like mold or slow growth.
- Flowering time: Faster-flowering strains increase turnover. Indicas typically finish in 8–9 weeks; sativas can take 10–12+ weeks. Choose based on your schedule.
- Plant size and shape: Tall strains fit spacious indoor or outdoor grows; compact ones suit small indoor or stealth setups.
- Disease resistance: Prioritize genetics resistant to pests and mold, especially in less controlled environments.
- Terpene profiles and flavor: Unique aromas and flavors (citrusy, piney, sweet) boost market appeal and branding.
- Seed vs. clone: Seeds offer diversity; clones guarantee uniformity. Your choice affects consistency and propagation.
- Legal compliance: Ensure strains meet local THC/CBD regulations to avoid legal issues.
Start with trusted breeders and strains known for their stable genetics. If you want a premium-quality flower, prioritize strains with THC levels above 20% and strong resin production. Matching your strain choice to your growing conditions and business goals increases your chances of a successful, profitable harvest.
So, how do you optimize your cannabis growth conditions? Let us understand below.
2. Optimizing Cannabis Growth Conditions
- Light: During flowering, provide intense, consistent light. Use full-spectrum LEDs or HPS lights that mimic natural sunlight. Ensure deep canopy penetration and adjust height (12–18 inches above) regularly.
Tip: Use a PAR meter to track intensity and avoid light burn.
- Nutrients: Shift your N-P-K ratio during flowering, less nitrogen and more phosphorus and potassium to boost trichome development. Monitor pH (6.0–6.5 for soil) and EC for balanced feeding.
Tip: Flush with clean, pH-balanced water every few weeks to prevent buildup.
- Temperature & Humidity: Maintain 68–77°F and 40–50% humidity during flowering. Slightly cooler nights can stimulate resin production.
Tip: Use a dehumidifier if humidity spikes and drops night temps by about 5°F.
- Air Circulation: Use oscillating fans and exhaust systems for steady airflow and fresh air exchange. This prevents mold, strengthens stems, and stabilizes conditions.
Tip: Air should gently move through the canopy, not blast it.
- CO2 Enrichment: Enhancing CO2 (1000–1500 ppm) can improve bud size and potency if your lights and nutrients can handle the boost.
Tip: Only add CO2 in well-optimized setups and monitor levels closely.
- Watering: Water deeply but let the soil dry slightly between sessions. Overwatering causes root issues, and underwatering leads to stress.
Tip: Use a moisture meter or check 1–2 inches below the surface by touch.
- Training & Pruning: Use topping, LST, and selective defoliation to improve light access and airflow. This boosts yield and lowers mold risk.
Tip: Start training early and remove only leaves blocking bud sites.
- Monitoring: Check pH, EC, moisture, temperature, and humidity daily. Stability is key because sudden changes can harm potency and growth.
Tip: Keep a grow journal or digital log of your daily readings and observations. Small adjustments made early prevent big problems later.
PlanaCan takes this further by creating detailed reports for each harvest, showing how your choices affect your yield. With everything in one place, it’s easy to spot patterns and figure out what works best. Your team stays on the same page, knowing exactly what to do and when. Using these insights helps you avoid mistakes and keep improving with every growth.
3. Topping and Fimming
Topping and filming are high-stress training techniques that involve cutting your plant’s main growth tips to encourage multiple new branches. This creates a bushier plant with more bud sites, which leads to higher THC-rich flowers, boosting yield and potency.
How To: Use sterilized scissors to cut just above a healthy node early in the vegetative phase. Remove the entire tip for topping or pinch off 70 to 75 percent for fimming to help your plant grow multiple shoots and recover well.
4. ScrOG (Screen of Green)
The ScrOG method uses a horizontal screen to train plants into a flat, even canopy, maximizing light exposure to all bud sites. By weaving branches through the screen, you increase resin production and promote uniform buds, boosting both yield and potency.
How To: Once branches develop, place a screen 8-12 inches above your pots. Gently weave and tuck branches under the screen to spread the canopy evenly. Continue training during the vegetative and early flowering stages, adjusting branches to maintain light and airflow for every bud.
5. Light and Temperature Fluctuations Near Harvest
As harvest approaches, gradually shortening the light cycle and lowering night temperatures mimics natural seasonal changes, encouraging cannabis plants to produce more trichomes rich in THC and terpenes.
How To: About one to two weeks before harvest, reduce your light schedule from a standard 12 hours on/12 hours off to 11 hours on/13 hours off. Simultaneously, lower night temperatures by around 5 to 10 degrees Fahrenheit. For example, if your normal night temp is 70°F, reduce it to 60-65°F.
Maintain these conditions for the final weeks of harvest, and monitor your plants closely for signs of excessive stress like leaf curling or discoloration. With PlanaCan, you can create detailed harvest reports that track every decision and its impact on yield. Having all data in one place helps you spot patterns, avoid mistakes, and improve your yields and profits over time.
6. Defoliation
Defoliation is the selective removal of large fan leaves that block light and airflow to lower buds, improving light penetration and reducing mold risk. This redirects energy from leaves to flower and resin production.
How To: In early to mid-flowering, carefully remove 20-30% of large shading leaves using clean scissors. Avoid heavy defoliation late in flowering to prevent stressing the plant and lowering yields. Monitor plant health afterward and adjust care as needed.
7. Low-Stress Training (LST):
Low-Stress Training (LST) gently shapes your cannabis plant to improve light exposure without damaging it. Bending and tying down branches during the vegetative stage encourages bushier growth and multiple bud sites, boosting potency.
How To: Use soft ties to slowly bend branches outward, securing them to stakes or the pot edge, and adjust regularly to maintain an even canopy for better light absorption and resin production.
8. Controlled Drought Stress
Mild drought stress near the end of flowering can boost resin and terpene production as the plant responds to survival threats.
How To: To do this safely, reduce watering in the last 1-2 weeks, letting the top inch of soil dry out slightly, but avoid letting plants wilt or the soil dry completely. Keep stress mild to encourage resin without harming the crop, and combine with other late-stage techniques for best results.
9. Nutrient Stress
During flowering, reduce nitrogen while increasing phosphorus and potassium to encourage your cannabis plants to focus on flower and resin development instead of leaves. This nutrient shift improves bud size and potency.
How To: Use a flowering nutrient formula with lower nitrogen and higher phosphorus and potassium at flowering start, gradually decreasing nitrogen while maintaining phosphorus and potassium throughout.
Monitor plants carefully for any nutrient deficiencies or imbalances, and adjust your feeding schedule accordingly to maintain healthy, potent buds. PlanaCan simplifies this with a clear visual timeline to plan and track tasks. Schedule work months ahead, manage daily activities, and adjust tasks as needed. By centralizing info, everyone on your team stays aligned and nothing gets missed.
10. UV Light Exposure
Supplementing with UV-B light during flowering can boost THC and trichome production, as plants produce more resin to protect against UV damage.
How To: Use UV-B lights for 1-3 hours daily in the last 2-3 weeks, keeping them 12-18 inches away to avoid leaf burn. Monitor plants closely and adjust as needed to increase potency safely.
Harvest Timing and Techniques
As a cannabis grower, your harvest decisions play a crucial role in determining the potency, flavor, and overall quality of your buds. Harvest too early, and you miss peak cannabinoid levels and terpene development; harvest too late, and cannabinoids start to degrade, altering the effects and lowering quality. Here’s what you need to know to get your harvest just right.
When to Harvest
Knowing exactly when to harvest is the foundation of producing potent, flavorful cannabis. Several visual and microscopic cues help you pinpoint the perfect moment to cut your plants.
- Monitor Trichome Development: Use a jeweler’s loupe or digital microscope to check trichomes closely. Clear trichomes mean the plant isn’t ready. Milky white trichomes show peak THC potency, while amber trichomes indicate THC is breaking down into CBN, which produces more sedative effects. Aim to harvest when 70-90% of trichomes are milky for a balanced, potent effect.
- Check Pistil Color: Track the pistils on your buds. When 70-80% of pistils have darkened and curled inward, it signals your plant is ready for harvest.
- Match Harvest to Desired Effect: For a more energetic, cerebral high, harvest earlier with mostly milky trichomes. For a heavier, sedative effect, wait until more trichomes turn amber.
- Consider Strain Differences: Different strains mature at varying rates. Track each strain separately to find its optimal harvest window.
Harvest Techniques
How you handle your plants during harvest significantly affects the quality and potency of your final product. Here are the key techniques to harvest your cannabis properly:
- Use Clean, Sharp Tools: Always use sterilized, sharp scissors or shears to make clean cuts that prevent bud damage and reduce the risk of mold or disease spread.
- Wear Gloves: Gloves protect delicate trichomes from being rubbed off by skin oils, preserving potency and preventing contamination.
- Harvest at the Right Time: For indoor grows, harvest early in the morning before lights on; for outdoor grows, harvest at dusk to capture peak cannabinoid levels and prevent degradation.
- Selective Harvesting: Harvest only mature buds or branches to maximize potency, allowing less mature parts to develop further for higher-quality yields.
- Flush Before Harvest: Stop nutrients 1-2 weeks before harvest and flush with water to remove excess salts, improving taste and cannabinoid profile.
- Limit Light Post-Harvest: Minimize light exposure during trimming and drying to prevent THC breakdown, and store buds in a cool, dark place to maintain potency.
Now, let us discuss how to dry and cure cannabis the right way.
How to Dry and Cure the Right Way
Harvesting is just the beginning. If you want top-shelf results, you can’t rush what comes next. Drying and curing are where potency, flavor, and aroma are preserved—or lost. Do it right, and your buds will shine. Here’s how.
Drying Your Cannabis
This is the first critical step after harvest. Proper drying removes moisture slowly to prevent mold and protect cannabinoids and terpenes.
- Choose the Right Environment: Hang your freshly cut branches in a dark, well-ventilated room. Darkness protects sensitive cannabinoids and terpenes from degrading.
- Control Temperature and Humidity: Keep the temperature steady between 60°F and 70°F (15°C–21°C) and humidity between 50% and 60%. Too hot or dry causes potency loss; too humid invites mold.
- Airflow Matters: Use small fans to circulate air gently around the room—but never point fans directly at your buds. Proper airflow reduces mold risk without drying too fast.
- Trim Wet or Dry: Decide whether to trim immediately after harvest (wet trimming) or wait until after drying (dry trimming). Wet trimming is easier in humid climates; dry trimming preserves terpenes better and slows drying.
- Use a Hygrometer: Monitor humidity with a hygrometer in your drying space to keep conditions consistent and avoid problems.
- Timing Is Key: Let your branches dry for 7 to 10 days. Buds should feel dry on the outside but still slightly springy when squeezed gently.
- Avoid Light and Heat: Keep your drying area dark and away from heat sources. UV light and high heat break down cannabinoids and terpenes.
Curing Your Cannabis
Once buds are dry, curing allows cannabinoids and terpenes to mature fully. It’s what takes your flower from harsh to premium.
- Transfer to Airtight Jars: After drying, trim your buds and place them loosely in airtight glass jars. Don’t pack too tightly to allow air circulation.
- “Burp” Your Jars Daily: Open jars once a day for 10 to 15 minutes during the first two weeks. This releases excess moisture and replenishes oxygen, preventing mold and promoting even curing.
- Maintain Ideal Humidity: Aim for 58% to 62% relative humidity inside the jars. Use humidity packs (like Boveda or Integra Boost) to keep levels steady.
- Be Patient: Cure for at least 4 weeks. Longer cures, 6 to 8 weeks or more, enhance cannabinoid stability and terpene profiles, giving you smoother, more potent, and flavorful buds.
- Use Smell as a Guide: Early in curing, buds may smell grassy or like hay. This is normal as chlorophyll breaks down. Aromas will improve with time.
- Monitor Regularly: Check your buds for mold or overdrying. Proper curing balances moisture to lock in quality.
- Store Properly After Curing: Once curing is complete, keep your jars sealed in a cool, dark place. Avoid frequent opening to preserve freshness.
So, how do you preserve the potency of your cannabis plants? Let us understand this below.
How To Preserve Cannabis Potency
As a cannabis grower, preserving the potency of your crop is crucial to delivering a high-quality product that satisfies your customers and maximizes your yield value. Potency mainly depends on preserving the cannabinoids and terpenes—the compounds responsible for cannabis’s effects, aroma, and flavor. Here’s how you can protect those precious compounds every step of the way.
- Harvest at the Right Time: Timing is everything. Harvest your plants when the trichomes (the tiny resin glands on buds) are at their peak maturity—usually when most trichomes turn milky white with some amber hues. Harvesting too early or too late can drastically reduce cannabinoid content, especially THC.
- Handle Your Buds Gently: Be mindful during harvesting and trimming. Rough handling can crush trichomes, causing a loss of cannabinoids and terpenes. Use sharp scissors or pruning shears, and avoid squeezing buds unnecessarily.
- Dry Your Cannabis Properly: Dry your buds slowly in a dark, well-ventilated space with temperatures around 60-70°F (15-21°C) and relative humidity between 45-55%. Drying too fast or too hot degrades THC and evaporates terpenes, reducing potency and flavor.
- Cure with Care: Curing is key to unlocking potency and preserving cannabinoids. Store dried buds in airtight containers (preferably glass jars) and burp them daily for the first two weeks to release moisture and prevent mold. Keep the jars in a cool, dark place with stable humidity around 60-65%.
- Store Cannabis Correctly: After curing, store your cannabis in airtight, opaque containers to block light and air exposure. Keep your stash in a cool, dark environment below 70°F (21°C). Avoid plastic bags or containers, as they can degrade potency and trap moisture.
- Protect From Light Exposure: UV light breaks down THC and other cannabinoids rapidly. Always store your cannabis away from direct sunlight and use dark containers to shield it from light.
- Control Temperature and Humidity: Excessive heat speeds up cannabinoid degradation. Avoid temperatures above 77°F (25°C). Likewise, too much humidity promotes mold, while too little dries out buds and causes terpene loss. Aim for 59-63% relative humidity during storage for optimal preservation.
- Avoid Excessive Handling After Curing: Once cured and stored correctly, minimize handling. Every time you open your containers or touch the buds, you risk losing trichomes and terpenes, which reduces potency.
Conclusion
Preserving potency isn’t a guessing game. It’s a disciplined process. From the moment you select your seeds to the final cure, every decision shapes the strength, flavor, and quality of your cannabis.
When you treat each stage with care, timing your harvest, drying slow, storing smart—you lock in the cannabinoids and terpenes your plants worked hard to produce. And when you handle your product right, you’re not just preserving potency. You’re building a reputation for quality.
If you want to take full control of your post-harvest process, PlanaCan makes it easy. PlanaCan helps you streamline every stage of your grow with customizable templates that guide you from germination to storage. Whether you're curing for maximum terpene retention or tracking drying room conditions, you’ll have a clear, visual timeline of every critical step.
With built-in automation, real-time updates, and a drag-and-drop calendar, you can schedule your entire grow cycle, make adjustments on the fly, and ensure nothing slips through the cracks. No more missed cure windows. No more inconsistent results.
Ready to protect your potency and grow confidently? Schedule a free call to learn how PlanaCan can help you grow smarter.


