You wait weeks watching your buds grow dense and frosty. But when it’s finally time to harvest, things go south. Your big buds turn brittle or lose their smell. Some dry too quickly, while others remain damp and moldy. Sound familiar? Many growers excel during the grow phase but struggle during harvest and post-harvest. And that’s where most of the bud’s flavor, potency, and bag appeal is won or lost.
This guide walks you through how to make big bud weeds the right way, from spotting peak maturity to drying and curing like a pro. If you want those tight, fragrant nugs that hit hard and taste clean, keep reading.
TL;DR
- Prepare before harvest by cleaning tools, pruning fan leaves, labeling strains, and setting up a proper drying space.
- Choose wet trimming for faster drying and mold prevention or dry trimming to preserve flavor and terpenes.
- Dry buds slowly in a dark, well-ventilated area at 60–70°F and 50–60% humidity until stems snap.
- Cure buds in airtight jars for 2 to 8 weeks, opening jars daily at first to release moisture and bring in fresh air.
- If buds smell grassy, extend curing time; if too dry, add humidity packs or natural rehydrators; discard moldy buds immediately.
Quick Glance at the Cannabis Growth Stages

Before jumping into harvest, it helps to know where your plant stands. Cannabis grows in clear stages:
- Germination (3 to 10 days): Seeds sprout and develop roots.
- Seedling (2 to 3 weeks): First leaves appear. Growth stays small.
- Vegetative (3 to 16 weeks): The plant focuses on size and structure.
- Flowering (8 to 11 weeks): Buds start forming and gaining weight.
- Harvest: Timing is critical here. One wrong move can ruin weeks of work.
Here’s a clear table outlining when harvesting, trimming, drying, and curing happen based on the cannabis growth stages:
Process
When It Happens
Harvesting
At the end of the Flowering Stage (6–10 weeks)
Trimming
Immediately after Harvest
Drying
After Trimming, for about 7–14 days
Curing
After drying, for 2 weeks to several months
When to Harvest Cannabis
Harvesting at the right time is crucial for obtaining potent, flavorful buds. Here’s what to look for:
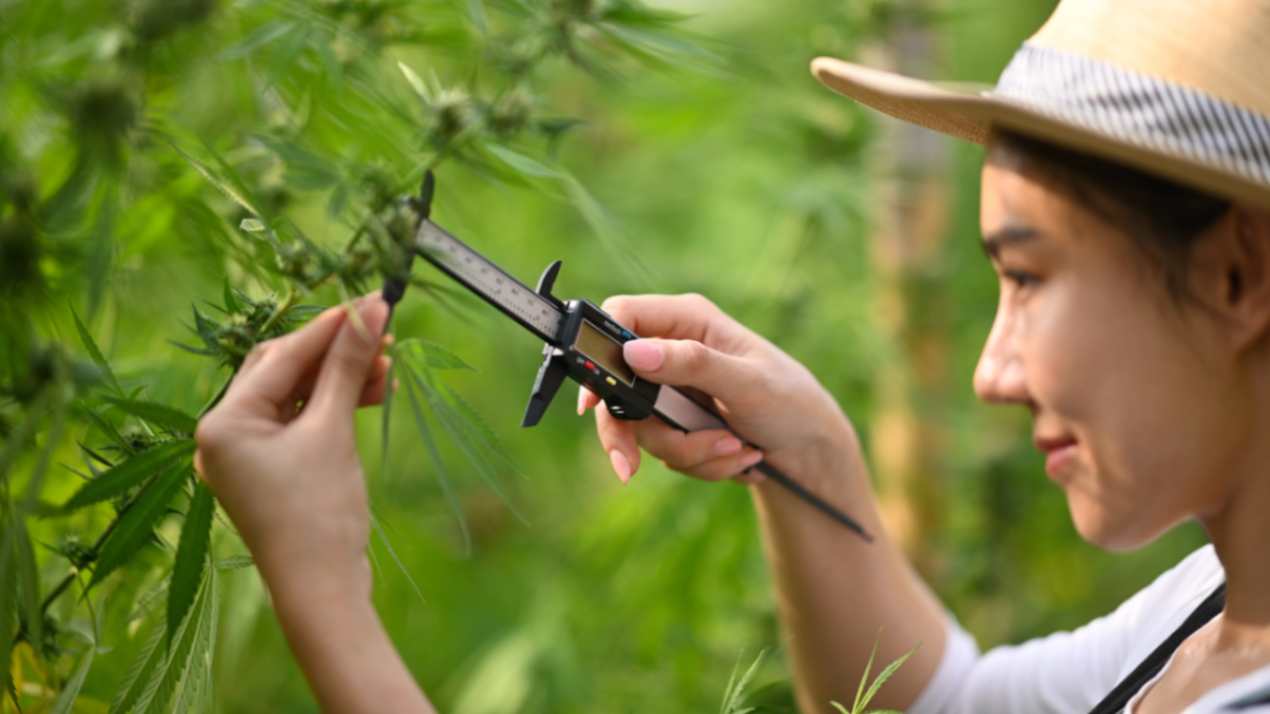
1. Pistils (Hairs): Look for darkened pistils. When 70 to 90% of the leaves have turned orange, red, or brown and started curling inward, your buds are nearing peak maturity.
2. Trichomes (Resin Glands): Under a magnifying glass, examine the trichomes on the buds.
- Clear: Not ready
- Cloudy or milky: Peak THC
3. Amber: More sedative effect
Aim for mostly cloudy with a few amber for a balanced result.
4. Bud Structure: Mature buds look thick and swollen. They feel dense when gently squeezed, not light or fluffy.
5. Leaf Color: The fan leaves often fade to a yellowish hue as the plant matures. This is a natural sign that nutrients are no longer being absorbed, and harvest is near.
So, before you start harvesting your cannabis plants, you should prepare them for harvest. Here's how to do it.
Preparations Before Harvesting Cannabis
Harvesting isn’t just about cutting down your crop. It’s about preserving quality, potency, and yield. Proper prep sets the stage for a smooth harvest and a cleaner cure.
Here’s what you need to do before harvest day arrives:
1. Check Trichomes, Not Just the Calendar: Don’t rely on a timeline alone to decide when to harvest. Instead, use a jeweler’s loupe or a digital microscope to inspect the trichomes. Clear trichomes mean it’s too early. Cloudy ones signal peak potency. If they start turning amber, you’re leaning more into a sedative effect. Decide what kind of high you want and harvest accordingly.
2. Flush Your Plants (If Using Bottled Nutrients): About 7 to 10 days before harvest, flush your plants with plain, pH-balanced water. This helps remove excess salts and leftover nutrients from the medium, which can otherwise affect the taste and smoothness of the final product. You’ll notice fan leaves starting to fade. That’s your plant using up stored nutrients.
3. Cut Back on Light Stress: Reduce your light intensity or shorten your light cycle a few days before harvest. This step isn’t mandatory, but it can ease stress on the plant and help preserve terpene profiles. Some growers even give their plants 24 to 48 hours of darkness right before harvest to boost resin production, though opinions vary on its impact.
4. Prune Fan Leaves in Advance: A day or two before harvest, remove large fan leaves that block airflow or light. This reduces moisture, making the drying process easier. It also gives you a head start on trimming, so you’re not overwhelmed later.
5. Plan Your Drying Space: Before you harvest, your drying space should already be ready. Clean the area thoroughly. Check the temperature (ideally 60-70°F) and humidity (50-60% RH). Set up fans for air circulation, but never point them directly at the buds. The space should be dark and secure, with good airflow and odor control.
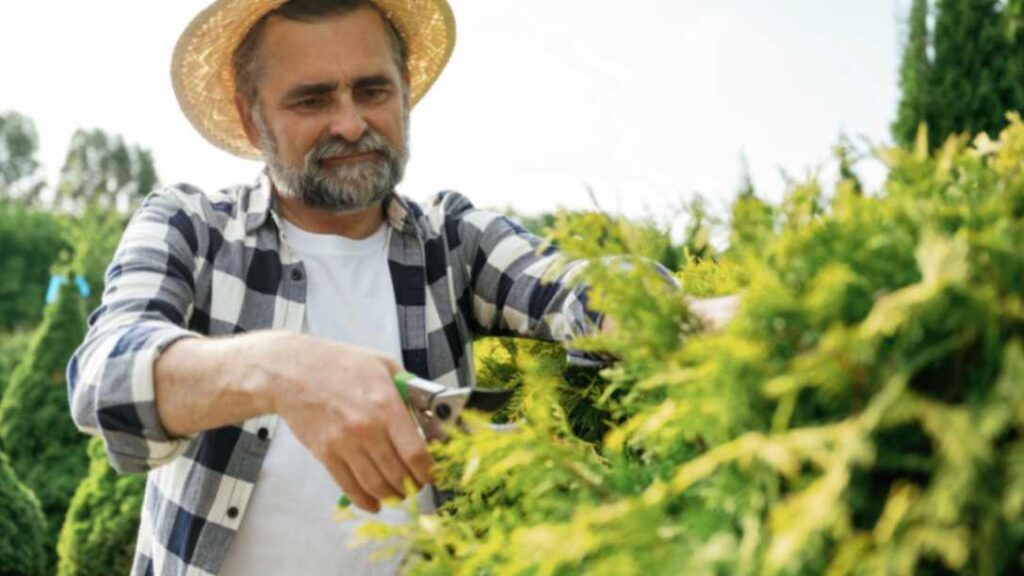
6. Sharpen and Sanitize Your Tools: Use clean, sharp scissors or garden shears. Dull blades can damage stems, making trimming frustrating. Sanitize your tools with isopropyl alcohol to avoid spreading mold or bacteria during the cut-down.
7. Decide Between Wet and Dry Trim: Will you trim your buds right after cutting them (wet trim), or will you wait until after they’ve dried (dry trim)? Wet trimming makes it easier to shape buds and helps them dry faster, but it’s sticky, messy work. Dry trimming takes longer but preserves terpenes better. Choose based on your setup and workflow.
8. Label Your Batches: If you’re growing multiple strains or phenotypes, label branches or bins before cutting anything down. Once the buds are drying, it’s hard to tell them apart. Effective labeling prevents confusion during trimming, curing, and storage.
9. Clear Your Schedule: Harvest isn’t something you want to rush. Set aside time, anywhere from a few hours to a full day, depending on your plant count. Turn off distractions, hydrate, and maybe even call in help if you’ve got a big crop. The more focused you are, the better your results.
10. Take Photos and Notes: Before you harvest, snap photos of your plants and document everything: strain details, feeding schedules, grow conditions, and harvest timing. This info will help you fine-tune your next run and spot patterns in potency, aroma, or yield.
Now, let us understand how to harvest your cannabis plant in detail below.
Also Read: When to Know Your Cannabis Plant is Ready for Harvest
How to Harvest Cannabis
Harvesting your cannabis plants is the moment you’ve been waiting for — the final step before enjoying the fruits of your labor. But cutting your plants at the right time and in the right way is crucial to preserving potency, flavor, and yield. Here’s how you can do it right.
Step 1: Confirm It’s Time to Harvest
Before you grab your scissors, make sure your plants are truly ready. Check the trichomes with a magnifying glass or jeweler’s loupe. You want most trichomes to look milky white, with some turning amber. This signals peak THC content.
Step 2: Prepare Your Harvest Tools
Use sharp, clean pruning shears or scissors. Clean tools help prevent the growth of mold or infection. Gloves will protect your hands and keep resin off you, which can get sticky fast.
Have everything ready so you can harvest smoothly without delays.
Step 3: Cut Your Plants or Branches
Decide whether to harvest the entire plant or cut it branch by branch.
- Whole plant cut: Cut the plant at its base near the soil. Hang it upside down by the main stem for drying.
- Branch-by-branch: Cut individual branches and hang them separately. This gives you more control if your drying space is limited.
Make clean, swift cuts to avoid damaging the plant material.
Step 4: Remove Large Fan Leaves (Optional)
Some growers remove the big fan leaves immediately after cutting, which helps airflow during drying. Others leave them until after drying to protect the buds. This is your choice based on your drying setup.
Step 5: Hang Your Cannabis to Dry
Hang your plants or branches upside down in a dark room with good ventilation, ideally at a temperature of 60 to 70°F (15 to 21°C) and 50 to 60 percent humidity. Make sure buds aren’t touching to avoid mold.
Drying usually takes 7 to 14 days. Your buds are ready when the small stems snap instead of bend.
Suggested Read: Guide to Drying and Curing Cannabis Quickly and Properly
How to Trim Cannabis
A clean trim enhances appearance, smoothness, and potency perception. Here's how to do it right.
Wet Trim vs Dry Trim
Before you start, decide how you’ll trim: wet or dry.
Aspect
Wet Trimming
Dry Trimming
When It's Done
Immediately after harvest, while the plant is still moist
After drying, once the buds and leaves become crispy
Process
Trim before drying
Hang the plant to dry first, then trim
Best For
Humid environments where mold is a concern
Controlled environments with good airflow and low humidity
Benefits
Easier to handle fresh leaves, reduces mold risk
Slower dry can improve flavor and preserve terpenes
Appearance
Results in a cleaner, tighter look earlier
Can produce a more natural, slightly fluffier finish
Difficulty Level
Easier to trim sticky, flexible leaves
Tougher to trim dry, brittle leaves
Here is the step-by-step process to trim your cannabis:
1. Remove the Fan Leaves: These are the large leaves that don’t have trichomes. If you're doing a wet trim, remove these right after harvest. If dry trimming, you can usually snap them off once the plant is dried.
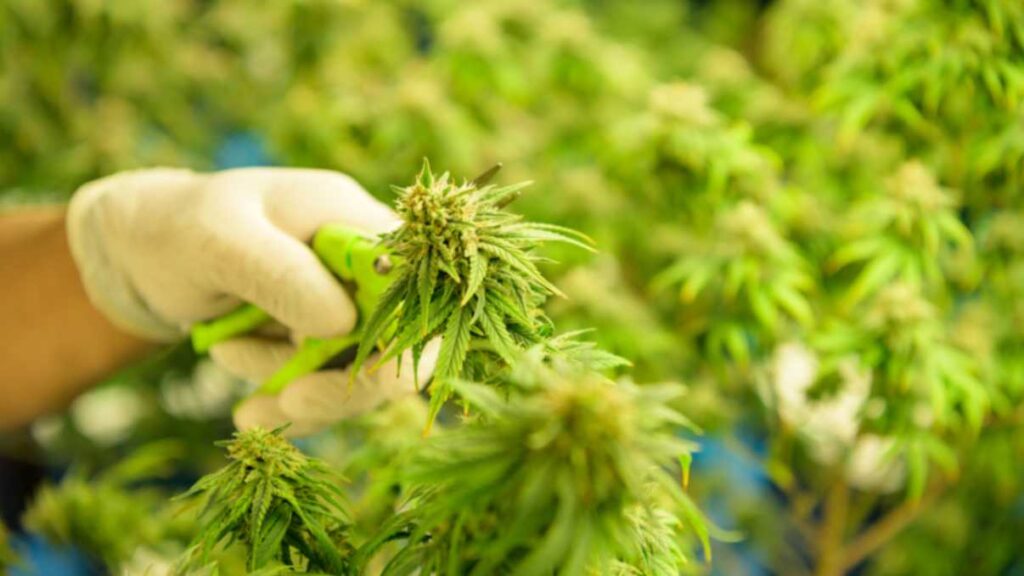
2. Clip the Sugar Leaves: These smaller leaves curl close to the buds and are covered in trichomes. You don’t need to remove them all. Just tidy them up. Trim off any protruding parts or elements that make the bud appear leafy. Some people save the sugar leaves for making edibles, kief, or concentrates.
3. Shape the Bud: Your goal is a tight, uniform nug with clean edges. Work your way around the bud slowly, turning it as you go. Trim from the bottom up, avoiding cuts that go into the bud itself.
4. Mind the Trichomes: Handle each nug gently. Trichomes are delicate and contain most of the cannabinoids and terpenes. If you’re rough, you’ll knock them off and lose potency.
5. Clean Your Tools Regularly: Resin buildup makes scissors stick and pulls on the bud instead of cutting it. Wipe your blades with alcohol every 15 to 20 minutes for a smoother, cleaner trim.
How to Dry Cannabis

Drying cannabis is crucial to preserving potency, flavor, and smoothness. Here’s how to dry your buds for the best results.
1. Prepare Your Space
Before you harvest, set up a dedicated drying area. It should be:
- Dark because light breaks down cannabinoids and terpenes
- Well-ventilated so air can move gently without blowing directly on the buds
- Temperature-controlled between 60 to 70°F (15 to 21°C)
- Humidity-controlled around 50 to 60% relative humidity
Use a hygrometer and thermometer to closely monitor these conditions. PlanaCan makes it even easier by generating detailed reports for each harvest, tracking every cultivation decision and its impact on yield. All this data is stored in one place, so you can review trends, spot what worked, and avoid what didn’t. Over time, this helps you fine-tune your process for better results and bigger profits.
2. Hang Your Buds
After harvesting and trimming (either pre-trim or whole-branch), hang your buds upside down to dry. Use:
- A clothesline, wire, or drying rack
- Plenty of space between buds or branches so air circulates freely
Avoid overcrowding. Poor airflow can lead to mold.
3. Maintain Proper Airflow
Place a small fan nearby to keep the air moving, but never aim it directly at the buds. This helps prevent stagnant pockets while allowing the flowers to dry evenly and slowly.
4. Monitor and Control Humidity
If the room is too humid, use a dehumidifier to protect against mold. If it’s too dry, the buds will crisp up too fast and lose quality. Adjust conditions as needed to maintain a 50-60% range.
5. Check Dryness Daily
Drying usually takes 7 to 14 days. Check the buds daily to catch any signs of mold or overdrying early.
Use the snap test:
- Bend a small stem
- If it snaps cleanly, the buds are dry
- If it bends without snapping, give it more time
6. Finish Drying Before Curing
Once the buds pass the snap test, move them into jars for curing. Don’t rush this step. A slow, steady dry lays the foundation for smooth smoke and proper cannabinoid preservation.
How to Cure Cannabis
Here’s a step-by-step breakdown of how to cure cannabis the right way:
1. Make Sure Your Buds Are Properly Dried First
Before curing, your buds should be dry enough that the outer surface feels crisp, but not so dry that the stems snap cleanly when bent. When you bend a small stem, it should make a quiet crack, not a loud snap or a rubbery bend.
If you jar buds that are too wet, you risk mold. If they’re too dry, you lose essential terpenes. Aim for that sweet spot where the outside feels dry, but the inside still holds some moisture.
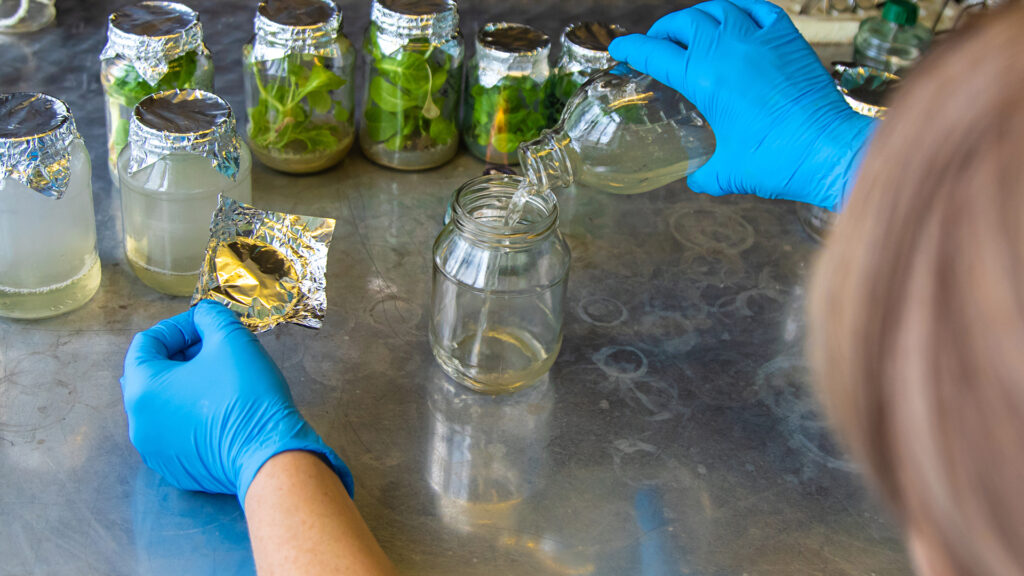
2. Use the Right Containers
You need airtight glass jars, preferably mason jars with wide mouths. Avoid plastic bags or containers, which can leach odors and trap static that pulls off trichomes.
Fill each jar about 65 to 75 percent full. You want enough space for air to circulate without letting the buds move around too much. Overstuffed jars restrict airflow, while half-empty ones dry out your buds too quickly.
3. Store in a Cool, Dark Place
Light and heat degrade cannabinoids and terpenes. Store your curing jars in a dark cabinet or closet, ideally in a cool location (between 60 and 70°F or 15 to 21°C) with a relative humidity of 55 to 65 percent. Avoid the kitchen, sunny shelves, or any area with temperature fluctuations.
If your ambient humidity is too low or high, consider using humidity packs like Boveda 62% to help stabilize the conditions inside the jars.
4. Burp the Jars Daily (First 1 to 2 Weeks)
For the first week or two, open each jar once or twice a day for 5 to 10 minutes. This lets out built-up moisture and stale air, and brings in fresh oxygen. Gently shake or stir the buds each time to prevent clumping and uneven curing.
This step is critical. If the buds still feel moist or the jar smells like ammonia, it’s a warning sign of trapped moisture. Air it out longer or more frequently.
5. Reduce Burping Over Time
After the first two weeks, your buds should be curing steadily. Now you can cut burping down to once every few days. By week three or four, you can stop burping altogether and just leave the jars sealed.
The longer you cure, the better the final product will be. Most growers aim for a minimum of three to four weeks. If you’re patient, curing for six to eight weeks (or even longer) can make a noticeable difference in aroma, smoothness, and flavor. To manage this phase and other growth tasks, PlanaCan offers a clear visual timeline. You can plan months in advance, adjust daily tasks, and keep everyone aligned so nothing gets missed.
6. Check for Mold, Mildew, or Overdrying
Even during the curing process, things can go wrong if you're not paying attention. Keep an eye out for signs of mold, such as white fuzz, unusual wet spots, or foul odors. If anything feels suspicious, isolate the affected jar immediately.
On the flip side, if your buds feel crumbly or smell like hay, they may be overdried or improperly cured. At that point, rehydration with a humidity pack can help, but it won’t fully fix what’s lost.
7. Know When It’s Fully Cured
Properly cured cannabis smells pungent and clean. The buds break apart easily but don’t crumble. The smoke is smooth on the inhale, and you’ll taste the strain’s natural profile instead of bitterness or harshness.
Curing requires patience, typically taking 2 to 4 weeks. Some go as long as 8 for extra smooth results. This final step separates average buds from top-shelf flower and plays a huge role in harvesting cannabis and curing it to perfection.
Troubleshooting Cannabis Issues
Even when you follow every step by the book, things can still go wrong during harvest and curing. You might notice strange smells, inconsistent drying, or even mold. These problems don’t always mean your crop is ruined, but they do need quick fixes. Here’s what to watch for and what you can do about it:
- Buds smell grassy: That strong grassy or hay-like scent usually means the buds dried too quickly or didn’t cure long enough. It’s one of the most common issues post-harvest.
- Fix it: Start by extending the cure. Store your buds in airtight jars and burp them once a day. Open the lid for a few minutes to release moisture and let in fresh air. Over time, this breaks down excess chlorophyll and sharpens the aroma. Don’t rush it. A proper cure can take two to four weeks, sometimes longer.
- Buds are too dry: If your buds feel brittle and crumble easily, they’ve dried out too much. Over-dried buds lose terpenes, hit harshly, and don’t store well.
- Fix it: You can restore moisture by adding a humidity pack, such as a Boveda 62%, to your jars. These maintain a stable environment without risking mold. For a DIY approach, place a small piece of orange peel or a damp cotton ball inside a mesh bag or tea strainer and put it in the jar. Just make sure it doesn’t touch the buds, and remove it after a few hours.
- Moldy buds: Moldy buds have a musty smell, appear fuzzy or discolored, and often develop on buds that are too wet or stored in a humid environment. If you catch it too late, it can ruin entire jars.
- Fix it: Don’t try to save moldy buds. Toss them out immediately. Carefully check nearby buds to see if the issue has spread. To prevent future outbreaks, always keep curing jars at a relative humidity of 55 to 65 percent, avoid overpacking, and inspect them regularly for signs of moisture buildup.
- Uneven drying: If some buds are dry and others still feel wet or soft, it’s usually because of size differences or airflow issues. Smaller buds dry faster, while thick colas take longer.
- Fix it: Sort buds by size before drying and hang similar ones together. Rotate buds on your drying rack if you’re using one. Once drying is done, cure buds in batches based on dryness level. You’ll get more control and fewer surprises.
Troubleshooting cannabis post-harvest is part of the process. You won’t always get it perfect the first time or even the fifth. However, when you stay alert, spot issues early, and know how to respond, you’ll keep more of your harvest high-quality. A little attention now saves a lot of frustration later.
Conclusion
Getting big bud weed isn’t just about what you feed your plants or how powerful your lights are. It comes down to timing, technique, and consistency, especially in the final stages of the process. From flushing and harvesting to slow drying and proper curing, these final steps make the difference between a decent flower and a top-shelf product.
However, even when you know the steps, staying on track can be challenging, especially when managing multiple plants, phases, and tasks. That is where PlanaCan helps. The platform gives you a clear timeline to manage your entire grow, from tracking nutrient schedules and monitoring runoff to planning your harvest, drying, and curing windows with precision.
No more missed flushes, rushed dries, or forgotten burps. PlanaCan keeps your grow organized and consistent so your buds come out dense, sticky, and potent every time.
Ready to dial in your grow from seed to cure? Schedule a free call today and take complete control of your next harvest.
FAQs
1. When is the best time to harvest cannabis for optimal potency and flavor?
Ans. The best time to harvest is when the trichomes on the buds turn from clear to milky white, with some amber hues. This indicates peak development of cannabinoids and terpenes. Harvesting too early or too late can affect potency and taste.
2. How long should I dry cannabis buds before trimming?
Ans. Typically, drying takes about 7 to 14 days in a controlled environment with 45-55% humidity and 60-70°F temperature. You want the buds to feel dry on the outside but still slightly spongy inside before trimming.
3. Is it better to wet trim or dry trim cannabis buds?
Ans. Both methods work, but wet trimming (trimming immediately after harvest) allows easier leaf removal and faster drying. Dry trimming (after drying the whole branch) helps preserve trichomes and can improve curing, but takes longer.
4. What is the purpose of curing cannabis, and how long should it last?
Ans. Curing enhances flavor, aroma, and smoothness by slowly removing residual moisture and allowing chemical changes. It usually lasts 2 to 8 weeks in airtight containers, with periodic burping to release moisture and gases.


