Are your cannabis plants showing weird spots, curling leaves, or pale discoloration, and you can’t figure out what’s going wrong? You’ve got your grow lights positioned just right, nutrients dialed in, and watering on point, but something still feels off. If that sounds familiar, you might be dealing with cannabis light burn. It creeps up fast and can seriously damage your plants before you even realize there’s a problem.
Light burn is one of the most overlooked issues in indoor cannabis grows. It mimics other symptoms, such as nutrient deficiencies or heat stress, which makes it harder to diagnose. But if you don’t spot it early, your yields and plant health can take a serious hit. Knowing how to read your plants and adjust your setup can save you time, money, and frustration.
Let’s break down exactly what marijuana light burn looks like, why it happens, and how you can fix it before it ruins your grow. You’ll learn how to recognize the first signs of light burn, avoid the most common mistakes, and get your plants back on track fast.
TL;DR
- Light burn usually affects the top leaves first, causing yellowing, bleaching, or curling.
- Too much light breaks down chlorophyll and slows photosynthesis, hurting growth and bud quality.
- Signs of light stress include leaf discoloration, curling, wilting, stunted growth, and foxtailing.
- Raising lights, lowering intensity, improving airflow, and maintaining dark periods help fix light burn.
What is Light Burn in Cannabis?
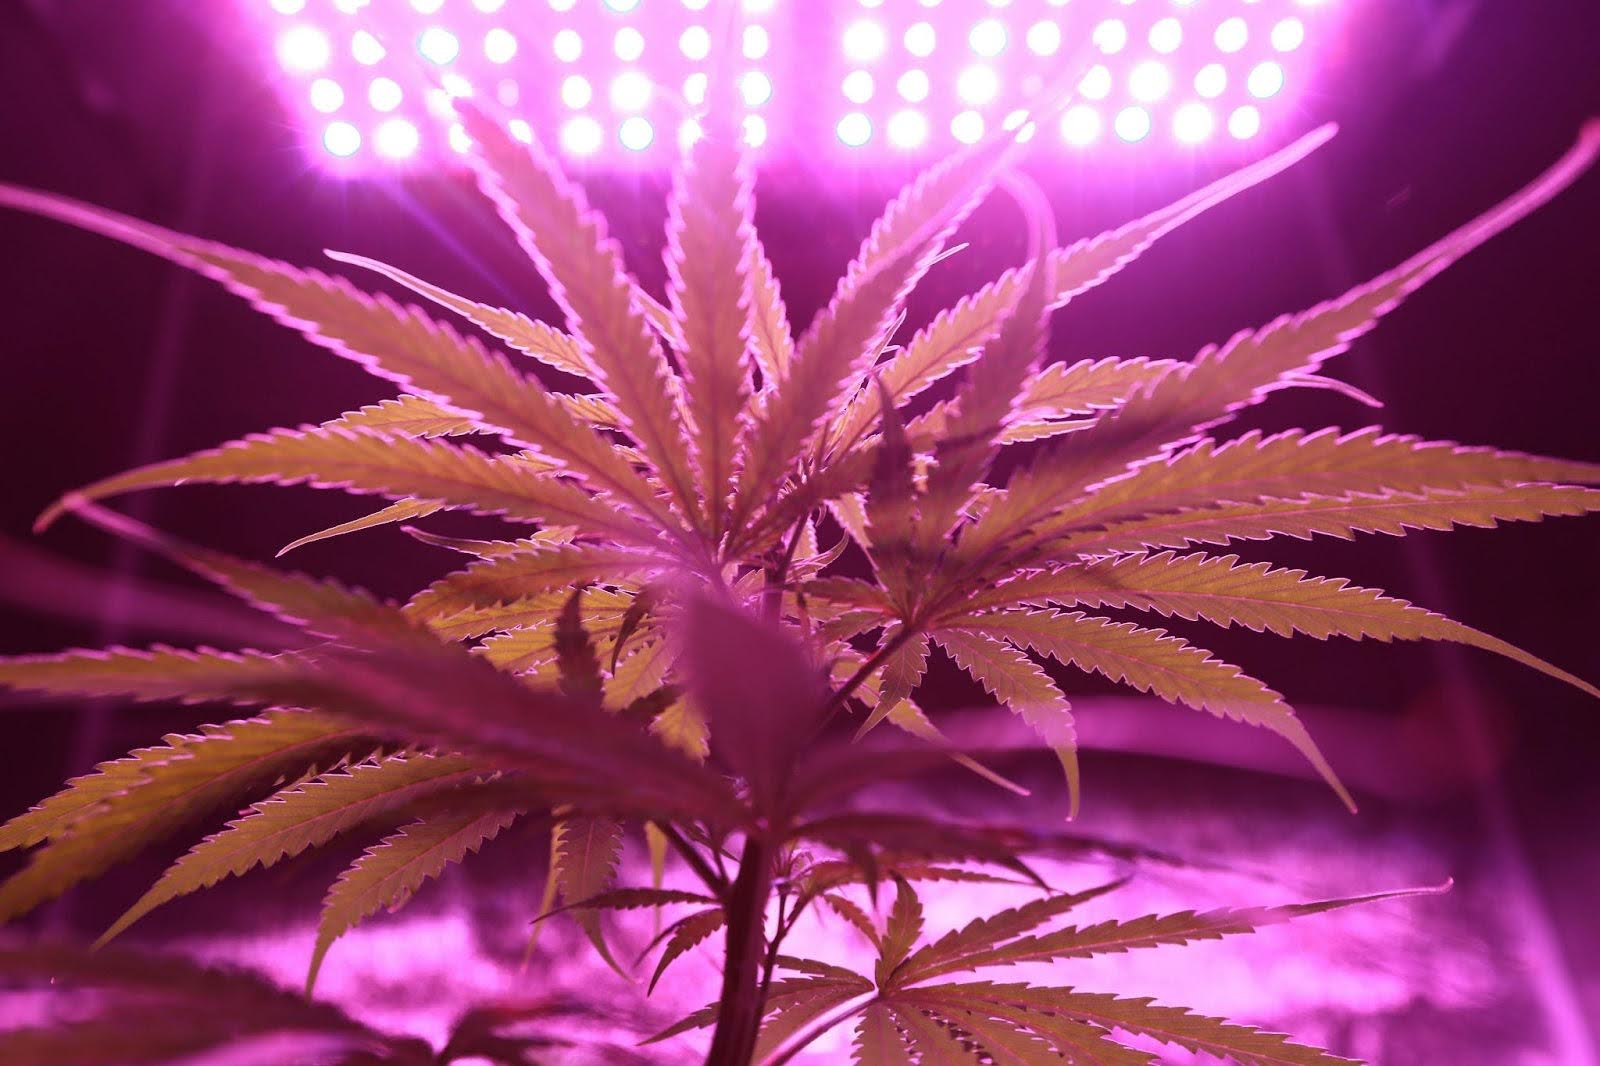
Light burn occurs when cannabis plants are exposed to excessive light intensity or placed too close to grow lights for prolonged periods. Unlike nutrient deficiencies, which often affect older leaves first, light burn typically impacts the topmost parts of the plant, which are closest to the light source.
Common symptoms include yellowing or bleaching of leaves, upward curling, and leaf tip burn. If left unaddressed, light burn can stunt growth, reduce yields, and degrade bud quality.
What Does Too Much Light Do to Cannabis?
While cannabis depends on light to grow and flower, there’s a tipping point where more light becomes harmful. Too much light overwhelms the plant’s ability to process energy, triggering a chain of adverse effects that reduce health, yield, and potency.
1. Causes Heat Stress: Excessive light increases canopy temperature, disrupting the balance of your grow room’s climate. The plant’s energy shifts from growth to survival. This slows development and makes internal processes less efficient.
2. Breaks Down Chlorophyll: Intense light degrades chlorophyll, the pigment that powers photosynthesis. When chlorophyll levels drop, the plant’s ability to create energy stalls. Growth slows and structural development weakens.
3. Damages Leaf Tissue: Too much light causes cellular damage in leaves. As tissue integrity breaks down, the plant loses surface area for photosynthesis. It becomes less efficient at absorbing light and nutrients.
4. Reduces Photosynthesis Efficiency: Once light intensity passes the plant’s usable limit, photosynthesis enters a state of decline. This is known as photoinhibition. Energy absorption stops scaling with light input, and metabolic activity drops.
5. Increases Water and Nutrient Demand: High-intensity light drives up transpiration rates. Water evaporates faster, and nutrient uptake increases to match demand. If not adjusted for, this creates nutrient imbalances, salt buildup, or root zone stress.
6 . Lowers Bud Quality and Yield: Chronic light stress results in smaller, less resinous buds. Terpene profiles weaken, trichome production drops, and cannabinoid content declines. This directly reduces the commercial value of your harvest.
7. Triggers Hermaphroditism: Overexposure to light, especially during dark periods, can cause plants to develop both male and female reproductive traits. This self-pollination reduces potency, usable yield, and creates seeded buds.
8. Disrupts Growth Cycles: Too much light interferes with hormonal balance. It disrupts the transition between vegetative and flowering stages. Growth patterns become irregular, and energy use becomes inefficient.
9. Limits Overall Plant Potential: The combined effects of overexposure—reduced energy production, structural damage, increased resource demand, and hormonal stress, prevent the plant from reaching its full genetic potential. Final yield and quality decline, regardless of strain or setup.
So, what are the causes of light stress in cannabis? Let us understand them below.
Causes of Light Stress in Cannabis

Light is vital for cannabis growth, but when mismanaged, it becomes a source of stress. Here’s how you might be causing light stress in your grow:
1. Lights Hung Too Close to the Canopy: When you position your grow lights too close to the plant tops, you expose them to excessive light intensity and heat. This overwhelms the upper leaves and buds, especially in the flowering stage.
2. Excessive Light Intensity: Using powerful LEDs or HPS lights without adjusting their output can overwhelm your plants. High-intensity light, especially when introduced suddenly, causes more harm than good.
3 .Inadequate Light Adjustment as Plants Grow: If you don’t raise your lights as your plants stretch upward, the increasing proximity leads to direct exposure and stress. Taller colas get scorched while lower nodes stay underlit.
4. Incorrect Light Spectrum: Each growth stage needs a specific light spectrum. Using too much red in veg or too much blue in flowers can disrupt growth patterns and trigger stress responses.
5. Light Leaks During the Dark Cycle (Photoperiod Strains): Even minimal light exposure during the dark period can confuse photoperiod strains. This disrupts their hormone cycle and leads to stress-related issues like hermaphroditism.
6. Uneven Light Coverage: If your lighting setup leaves parts of the canopy underexposed or overly lit, it creates inconsistent growth conditions. Some areas may stretch while others burn.
7. Starting Seedlings Under Intense Light: Young seedlings can’t handle the same intensity as mature plants. If you place them directly under high-powered lights from day one, they experience shock and stunted growth.
Avoiding light stress means keeping a close eye on your grow room and staying flexible as things change. That’s where PlanaCan can help. It provides a clear visual timeline, allowing you to plan tasks weeks or months in advance while managing daily work. As your growth evolves, you can easily adjust tasks. Since everything is in one place, your whole team stays on the same page, so nothing slips through the cracks. This makes it easier to maintain a consistent light schedule and keep your plants healthy.
Now, let us learn how to identify light stress in cannabis and how to treat each one of them.
How to Identify And Treat Light Stress in Cannabis
When your plants get more light than they can handle, they start showing stress signals that impact everything from leaf health to bud formation. On the other hand, insufficient light slows down growth, resulting in thin, weak plants that yield poorly.
The good news is that cannabis plants are communicative. Once you learn the signs of light stress, you can make fast adjustments to restore balance. Here’s how to recognize each warning sign and exactly how to fix it.
1. Leaf Discoloration
If the upper leaves of your cannabis plant start to fade from green to yellow or pale lime, or you spot bleached white patches near the tips, you’re likely dealing with light stress. These changes are especially common under intense grow lights like LEDs and HPS, which can damage chlorophyll and reduce your plant’s ability to photosynthesize. In severe cases, leaf edges may turn brown or feel crisp to the touch, which are classic signs of light burn.
How to Fix
Raise your grow lights to increase the distance from the canopy and reduce the light’s intensity. If your fixture is dimmable, turn it down slightly. Excessive blue or UV light can intensify bleaching, so consider switching to a full-spectrum setup that is balanced for your current growth phase. It also helps to confirm that your plants have enough magnesium and iron, which support healthy leaf color and protect against light-induced deficiencies.
2. Leaf Curling or Clawing
When your leaves curl downward like talons or twist unnaturally, your plants are trying to reduce their surface area to protect themselves from excessive light or heat. This often happens at the top of the canopy where light hits hardest. You might also notice dark green coloration, which could lead you to confuse it with nitrogen toxicity, but it’s actually your plant’s attempt to shield itself.
How to Fix
Raise your lights and observe any changes over 24 to 48 hours. This adjustment alone can relieve stress. Use oscillating fans to help move warm air away from the canopy and reduce temperature buildup. If light stress persists, consider shortening your light-on period or switching to a cooler-running light system that produces less radiant heat.
3. Wilting or Drooping Leaves
Drooping leaves usually suggest underwatering, but if your medium is moist and roots are healthy, excess light and heat may be the cause. High light intensity increases transpiration, which causes the plant to lose water faster than it can absorb it. Leaves will sag, especially during peak lights-on hours, then sometimes recover after lights go off.
How to Fix
Measure the temperature at canopy level using a digital thermometer or infrared gun. If it's over 85 to 88°F (29 to 31°C), that’s a problem. Raise the lights, add ventilation, and maintain airflow across the plant tops. Consider increasing the humidity slightly to reduce water loss through the leaves. Ensure your fans aren’t drying out your plants further by directing the air gently, rather than directly at the leaves.
4. Slow or Stunted Growth
If your cannabis plant seems to hit a developmental plateau with small leaves, short internodes, and minimal vertical growth, it may be experiencing light stress. This often happens when lights are too intense during early veg or if your light schedule is too long for the plant’s stage.
How to Fix
Use a PAR meter, or consult your light's manufacturer data, to match intensity to your plant’s stage. Seedlings and clones only require 200 to 400 PPFD, while mature plants in flower require 600 to 1000 PPFD. Reduce light intensity or shorten your cycle if you're pushing your plants too hard. Also, ensure your lights are providing the right spectrum, since plants grow best under balanced red-blue or full-spectrum white light.
5. Bleached or White Buds
When flowering colas begin turning stark white or lose their natural green tones, it usually means the buds are being light-bleached. This often occurs when plants are grown too close to intense LEDs or when lights are kept too low to maximize yields.
How to Fix
Raise your lights and refocus them to spread intensity more evenly across the canopy. You can also install a light diffuser to soften the direct output. During mid to late flowering, avoid running your lights at full intensity unless you're certain the canopy can handle it. Overexposure may temporarily boost growth, but it will ultimately degrade flavor, aroma, and potency over time.
6. Curling or Twisting of New Growth
New shoots and leaves should grow out straight and symmetrical. If they come in curled, twisted, or irregularly shaped, it’s often a sign of environmental stress, especially from lights that are too close or too intense. This symptom is most common in young plants still adjusting to artificial conditions.
How to Fix
Raise your lights and allow new growth some space to recover. For seedlings or newly transplanted clones, use low-output fluorescent or LED lighting at moderate distances. Increase intensity gradually as the plant matures. Sudden exposure to high-powered lights can cause permanent deformation of new tissue, so be patient and watch for improvements.
7. Foxtailing
Foxtailing appears as spindly, elongated growth on your buds, usually at the top closest to the lights. Some cannabis strains are genetically prone to foxtailing, but when it's light-related, it usually results in airy, lower-quality buds.
How to Fix
Reduce light intensity in the final weeks of flowering to prevent heat and stress-related bud deformation. Raise your light fixture and reduce the room temperature slightly during the day to maintain stable conditions. If you’re using powerful LEDs or HPS lights, consider moving them back or using a parabolic reflector to spread the light more evenly.
8. Uneven Canopy Development
If your plant's top colas look overexposed or burnt while outer branches grow slowly and stretch more, the light is likely hitting some areas too hard and missing others. This leads to inconsistent bud development and wasted energy.
How to Fix
Adjust your lights or use multiple fixtures to spread intensity more evenly. Consider using light movers or adding reflective surfaces, such as Mylar, to help redirect stray photons to shaded areas. Keep your canopy flat and even through topping, low-stress training, or scrogging so every bud site gets consistent light exposure.
9. Stretched Internodes in Lower Growth
While intense light stresses the top, the bottom of your plant might get too little light, leading to long, weak gaps between nodes and thin stems. These underdeveloped lower branches won’t support dense buds and are often better off removed if they can’t catch enough light.
How to Fix
Use canopy management techniques, such as pruning large fan leaves or training branches outward, to allow lower sites to receive more light. You can also add supplemental side lighting to reach shadowed areas. Maintain an even canopy height to prevent a single tall section from blocking all light from reaching the lower sections.
10. Delayed Flowering or Re-Vegging
If you notice new fan leaves forming at bud sites, or your plant seems stuck in pre-flower for too long, your light cycle might be inconsistent. Photoperiod plants are especially sensitive to interruptions during the dark period.
How to Fix
Double-check your grow space for light leaks. This includes LED indicators, timers, or ambient room light seeping in during the dark cycle. Make sure your timer is reliable and accurate, delivering 12 uninterrupted hours of darkness each day during flowering. Even brief light leaks can cause stress that delays or reverses flowering.
To keep track of these factors and more, PlanaCan lets growers create detailed reports for each harvest. It gathers data on every cultivation decision and how it affects the final yield, all organized in one place. By reviewing these reports, growers can identify trends, pinpoint what works, avoid past mistakes, and refine their processes to boost yields and enhance profitability.
Common Types of Grow Lights for Cannabis
When growing cannabis, the right grow light makes all the difference. Here are the most common types you should consider:
- LED Grow Lights: You’ll benefit from low energy use and less heat. LEDs provide a full light spectrum that supports every growth stage, from seedlings to flowering.
- High-Pressure Sodium (HPS) Lights: Perfect for flowering, HPS lights emit an orange-red spectrum that boosts bud production. They run hot and consume more electricity, so plan for good ventilation.
- Metal Halide (MH) Lights: Use MH lights mainly during the vegetative stage. They produce a blue-white spectrum that encourages leafy, strong growth, but also run hot and draw significant power.
- Fluorescent Lights (CFL and T5): Ideal for seedlings and clones. These use little energy and produce less heat, but do not penetrate dense foliage well, so they are less effective for mature plants.
- Ceramic Metal Halide (CMH) / Light Emitting Ceramic (LEC): Offering a balanced, natural sunlight-like spectrum, CMH or LEC lights support all growth stages. They are cooler and more efficient than traditional HPS or MH.
- Plasma Grow Lights: A newer option that mimics natural sunlight closely, plasma lights offer excellent light penetration and efficiency. They run cooler than HPS, but tend to be more expensive and less common.
- Incandescent Lights: Generally not recommended for cannabis. They produce excessive heat, consume a significant amount of energy, and do not provide the optimal spectrum for healthy growth.
Here’s a quick table showing the ideal distance to keep various types of grow lights from cannabis plants for optimal growth and health.
Type of Grow Light
Recommended Distance from Plants
LED Grow Lights
12 to 24 inches (30 to 60 cm)
High-Pressure Sodium (HPS)
18 to 36 inches (45 to 90 cm)
Metal Halide (MH)
12 to 24 inches (30 to 60 cm)
Fluorescent (CFL/T5)
6 to 12 inches (15 to 30 cm)
Ceramic Metal Halide (CMH/LEC)
12 to 24 inches (30 to 60 cm)
Plasma Grow Lights
24 to 36 inches (60 to 90 cm)
Incandescent Lights
Not recommended
Conclusion
Light stress is a common yet avoidable issue in cannabis cultivation. With the right attention to light distance, intensity, and your plant’s daily response, you can prevent light stress before it damages your yield. Spotting symptoms early and making quick adjustments is key to keeping your growth on track.
However, tracking all of this manually can be overwhelming, especially when managing multiple plants or working with a team. That’s where PlanaCan comes in. The platform helps cultivators stay ahead of problems like light burn by monitoring plant health, managing lighting schedules, and offering real-time insights into environmental stress factors. You’ll also benefit from automated task reminders, growth stage tracking, and collaboration tools to ensure nothing slips through the cracks.
Ready to grow smarter? Schedule a free call today with PlanaCan and see how it can take the stress out of managing light stress and everything else in your grow.
FAQs
1. What are the common signs of light stress in cannabis plants?
Light stress typically shows as leaf curling (upward or clawing), yellowing or bleaching of leaf tips and edges, burnt or crispy leaves, and slower growth. Plants may also show leaf bleaching on areas directly exposed to intense light.
2. How can you differentiate light stress from nutrient deficiencies or other problems?
Light stress often appears first on the newest growth exposed directly to the light source and causes bleaching or leaf curl, whereas nutrient deficiencies usually cause discoloration patterns (yellowing, spots) starting on older leaves. Also, light stress symptoms often coincide with very close or intense lighting conditions.
3. What light intensity or distance is safe to avoid light stress?
Safe distance depends on the light type: for example, high-powered LED grow lights should generally be kept 18-24 inches above the canopy during vegetative stages and 12-18 inches during flowering. Always check your light manufacturer’s guidelines and adjust based on plant response.
4. How do you treat or fix light stress in cannabis plants?
First, reduce light intensity or increase the distance between lights and plants. You can also lower the photoperiod intensity temporarily or use light diffusers to soften light exposure. Ensuring proper airflow and humidity helps plants recover faster. Removing severely damaged leaves can redirect energy to healthier growth.
5. Can light stress affect the overall yield and potency of cannabis?
Yes, prolonged light stress can stunt growth, reduce bud size, and negatively affect cannabinoid and terpene production. Early detection and adjustment of light conditions help maintain healthy plants and optimize yield and potency.


