Learn how to setup your Dutchie integration and start automatically tracking room movements and plant counts for each Harvest schedule.
Table of Contents
Connecting your Dutchie API
To set up your Dutchie integration you need your cultivation's unique API Key from Dutchie.
Once you have it, head to "Edit Company Settings", and enter the API key under the Dutchie tab:
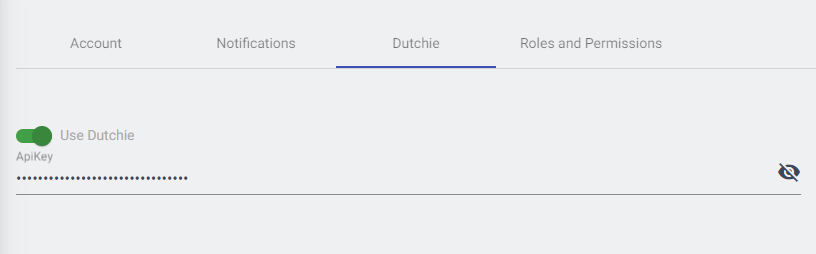
Once you've entered the API key, toggle "Use Dutchie" above where you entered your API key.
Once connected and saved, you'll receive a prompt to automatically update your Grow Settings with your cultivation information in Dutchie.
This will update the rooms (Zones) and strains in PlanaCan with the information stored in Dutchie.
Dutchie admin permissions
To the right of the API key entry, there's a dropdown that lists every user in your cultivation.
Here, choose which users will be able to manage the Dutchie API, including making changes to which batches are linked with each Harvest schedule.
We recommend only giving one or two cultivation leaders permission to make changes to avoid unwanted mistakes (nobody wants too many cooks in the kitchen!).
Updating your Templates to sync with Dutchie
Once your Dutchie integration is synced, head to your Templates page to apply a Dutchie Compliance Phase to each existing PlanaCan Phase.
Each Compliance Stage corresponds with each batch and its Plant Phase in Dutchie:

Be sure to update all Templates you use to schedule Harvests with a Compliance Phase for each PlanaCan phase in your Template.
Any Compliance Phases that aren't accounted for in the Template for won't be shown in PlanaCan.
Please also make sure to sync changes made in your Template (you'll be prompted to when you save the Template) so your active Harvest schedules are updated as well.
Linking plant information from Dutchie with harvest schedules
Once Dutchie is synced and your Templates are updated to include Compliance Stages, you're ready to link each Dutchie batch with your PlanaCan Harvest schedules.
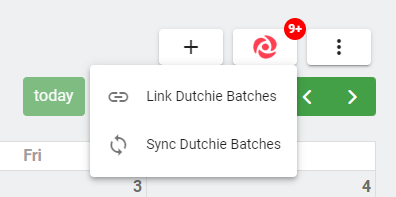
To do that, head to the Dutchie icon on either the Harvests tab or the Calendar tab.
The Dropdown has two options:
- Link Batches - choose from a list of unlinked Dutchie batches, and connect them a PlanaCan Harvest schedule
- Sync Batches - manually sync data from Dutchie to make sure the most current batches, plant counts, and current room are displayed (this sync happens automatically each evening)
To connect and associate a Dutchie batch with Harvest schedule, click Link Batches, and a popup showing all unlinked Dutchie batches will appear:
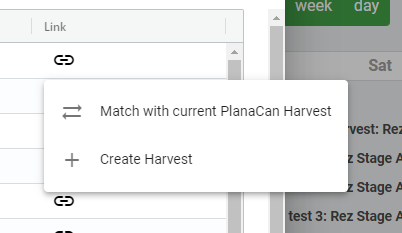
On the right, click the icon to link each Batch to an active Harvest schedule, or create a new schedule that will link the Dutchie batch information.
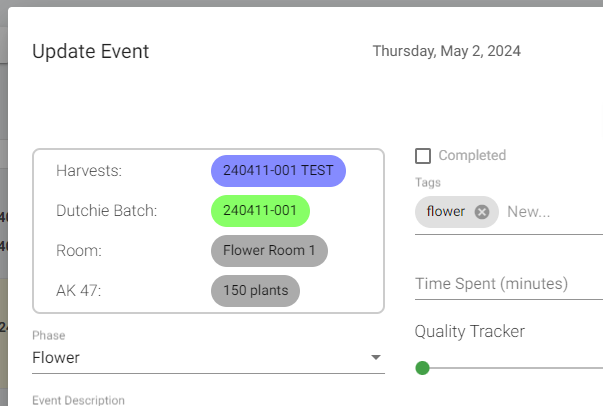
Once linked, all plant counts, strain, and room info will now be associated with that Harvest, and appear on each Event:
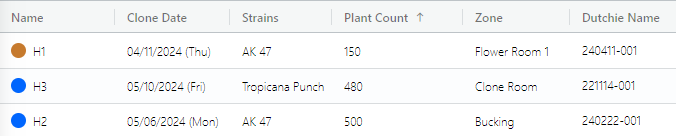
You'll also be able to view current batch info in the Harvests Tab:
Getting the most out of the Dutchie integration
With the Dutchie integration setup, you'll be able to track plant counts, attrition, and room movements for each Harvest, and the entire cultivation.
To get the most out of the integration, try saving a view for each room - to learn more about saved views head here.


