Drying is where your harvest transforms from raw plant material into aromatic, smokable flower. The process might seem simple, hang and wait, but in reality, this stage determines whether your cannabis retains its flavor and potency or turns harsh, grassy, and brittle.
When done right, drying removes water gradually while keeping cannabinoids and terpenes intact. When rushed or done in a hot, bright room, it destroys months of work in days. The good news is that precise drying is less about fancy gear and more about consistency. Once you understand what happens inside each bud and how to control the environment, you can achieve professional-quality results in any space.
This guide covers the entire process, from trimming to environmental control, drying timelines, and post-dry curing, based on best practices from leading cultivation experts.
TL;DR (Key Takeaways)
- Dry cannabis at 60–70°F (15–21°C) and 45–55% relative humidity, in darkness with gentle, indirect airflow.
- Drying usually takes 7–14 days, depending on bud size, density, and ambient climate.
- Hang-drying whole branches is ideal for slow, even drying; rack drying suits humid regions with good dehumidification.
- Drying ends when stems snap cleanly and buds feel dry on the outside but slightly spongy inside.
- Begin curing at 58–62% RH in airtight containers to stabilize moisture and preserve terpenes.
- Always keep air movement indirect; direct airflow can cause uneven drying and terpene loss.
What Happens During Drying and Why It Matters\
Drying is a controlled form of dehydration, and it’s one of the most critical steps in post-harvest cannabis handling. You’re not just evaporating water; you’re allowing chlorophyll and other plant compounds to break down slowly while preserving the delicate trichomes that contain cannabinoids and terpenes.
The Science Behind the Process
When cannabis is freshly harvested, its moisture content can exceed 70%. Most of that water is stored in the inner cells and stems. As buds dry, moisture moves from the inner tissues to the surface, where it evaporates into the air. If this happens too quickly, for example, in a hot or windy room, the outer layers dry first, trapping moisture inside. This “case-hardening” leads to uneven drying, mold risk during curing, and that familiar “hay” or “grassy” smell.
Controlled drying at cooler temperatures allows internal moisture to escape evenly, preventing mold and harshness while retaining the plant’s aromatic compounds.
Why darkness matters:
Light breaks down THC and terpenes. Studies on cannabinoid stability show that THC oxidizes rapidly under UV and visible light. Keeping your drying area completely dark preserves potency and color.
The Target Range
Most experienced growers follow what’s known as the “60/60 rule”, 60°F temperature, and 60% relative humidity. This creates a balance where water leaves the plant slowly, minimizing terpene loss. If your region is humid, lean toward the lower end of the humidity range (45–50%). In dry climates, stay closer to 55%.
At these levels:
- Chlorophyll degradation occurs naturally, giving buds their clean aroma.
- Trichomes remain intact, retaining cannabinoids and oils.
- Water activity stabilizes near 0.55–0.65, the sweet spot for shelf-stable cannabis that resists mold.
Even small deviations can alter quality. For instance, drying above 75°F or below 40% RH can evaporate terpenes like limonene and myrcene, which give cannabis its citrus and herbal notes.
Signs of a Properly Controlled Environment
- The drying room feels cool, dry, and slightly crisp, not muggy or drafty.
- The buds lose weight steadily without feeling brittle.
- The smell remains pleasant and grassy-green, not sharp or moldy.
- Small stems bend slightly and nearly snap by day seven to ten.
Whether you’re drying one plant or an entire harvest, environmental control is your most powerful quality lever. Once you maintain the correct temperature, humidity, and airflow, you can fine-tune everything else.
Managing drying conditions across multiple rooms or harvest batches can get complex. PlanaCan helps you plan drying schedules, set environmental checks, and track every step until curing, all in one place. Schedule a free call today.
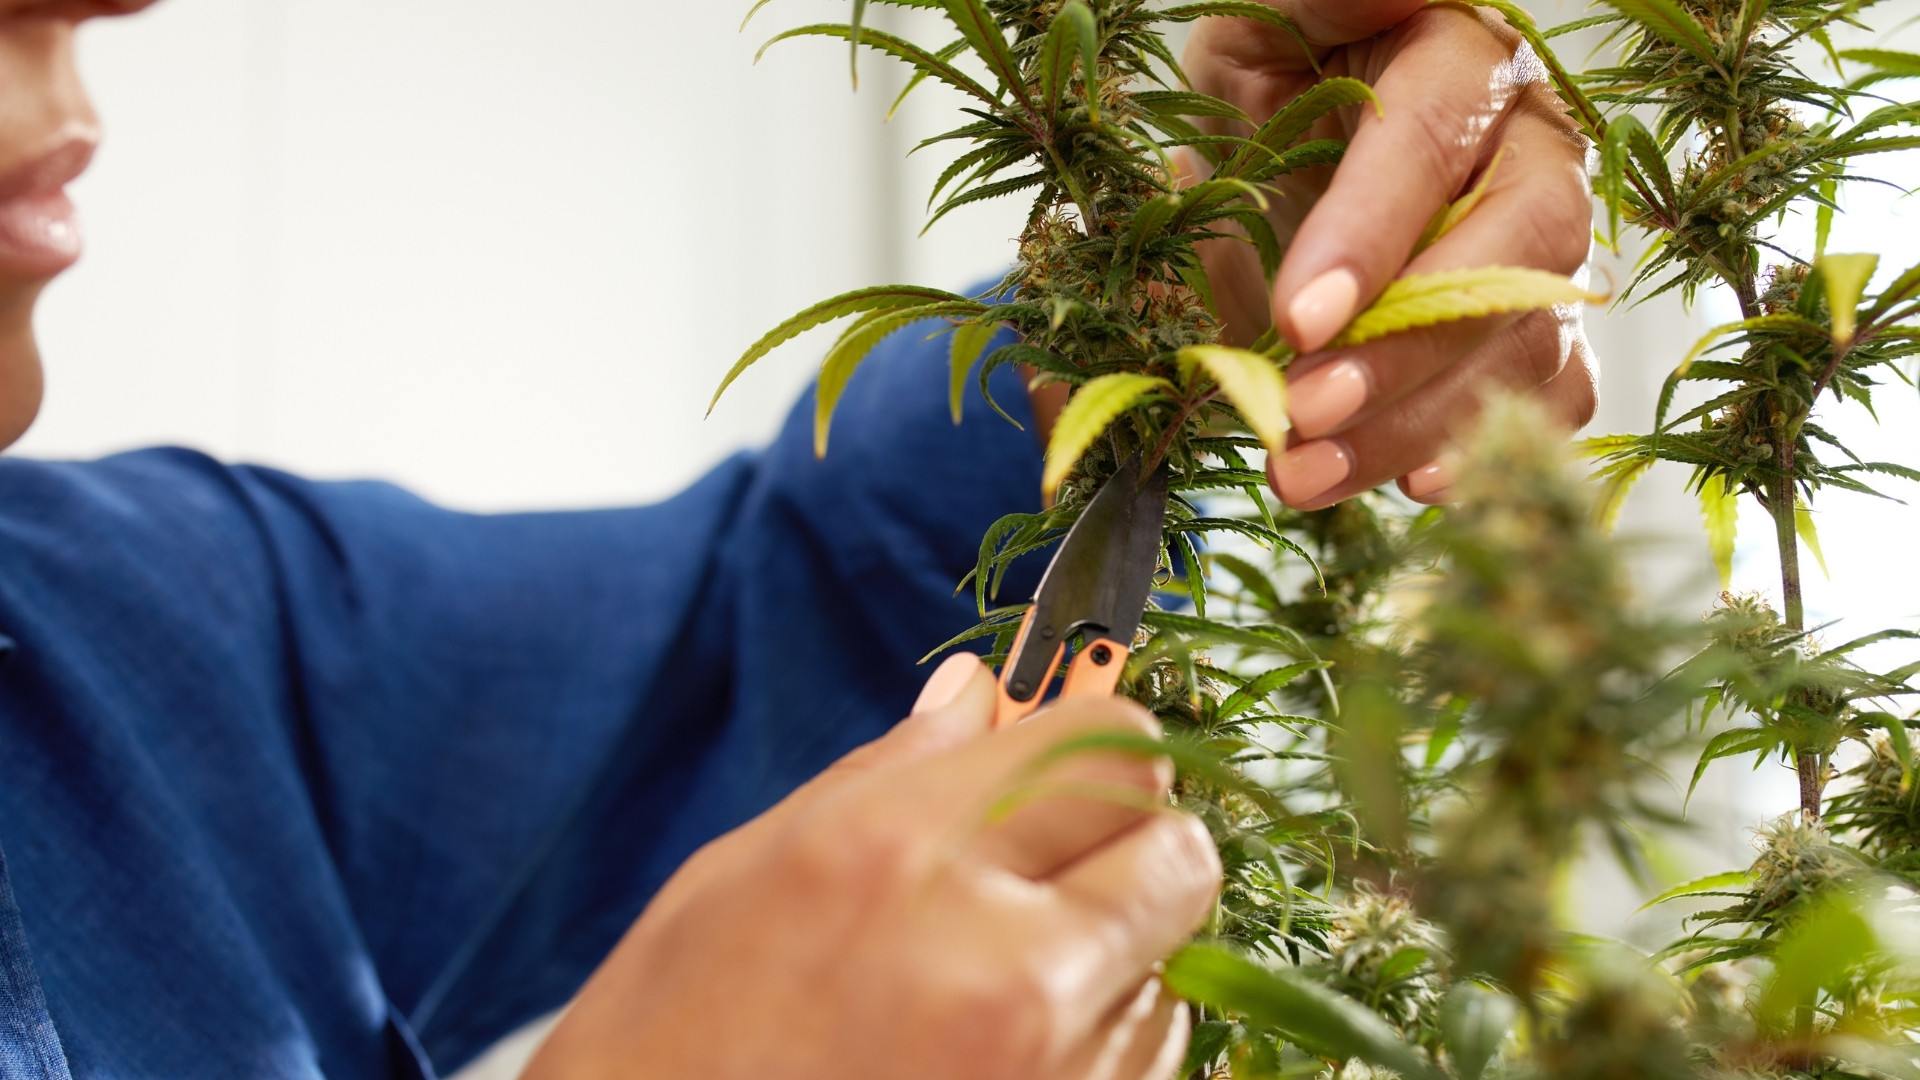
Readiness at Harvest: Trim Strategy and Pre-Dry Steps

Before drying begins, your trimming approach determines how the process will unfold. Whether you trim immediately (wet trim) or after drying (dry trim) depends on your climate, space, and labor setup.
1. Wet Trim vs. Dry Trim
Wet Trimming (before drying):
This method involves removing fan leaves and sugar leaves right after harvest while the plant is still fresh. It’s faster and more manageable for humid climates since less foliage reduces trapped moisture. Wet trimming exposes more bud surface area, helping prevent mold in dense or moist environments.
Pros
- Reduces drying time by a day or two.
- Minimizes mold risk in humid regions.
- Easier to handle sticky leaves when they’re still soft.
Cons
- Exposes trichomes directly to air, which can accelerate terpene loss.
- It can cause buds to flatten or dry unevenly if left on a rack.
2. Dry Trimming (after drying):
In this approach, you hang the entire plant or large branches to dry with leaves intact. The leaves act as a natural buffer, slowing evaporation. This works best in arid regions or rooms with strong dehumidification.
Pros
- Slower drying preserves terpenes and smoothness.
- Better shape retention and visual appeal.
- Less shrinkage and reduced harshness in smoke.
Cons
- Requires more drying space and time.
- Risk of mold if airflow and humidity are not properly managed.
Preparing the Drying Area
Before harvest day, make sure your drying space is clean, sealed, and controllable. You’ll want to sanitize walls, floors, and racks using a mild hydrogen peroxide or alcohol solution. Even a few spores can ruin an entire harvest.
Checklist before hanging:
- Darkness: Light degrades THC; the room should remain dark except during checks.
- Airflow: Gentle, indirect, and consistent. Fans should circulate air, not blow on buds directly.
- Dehumidification: Keep a calibrated dehumidifier ready; drying cannabis releases a surprising amount of moisture into the air.
- Sensors: Use a reliable hygrometer and thermometer. Consider a data-logging device for continuous monitoring.
- Hanging setup: Space branches so they don’t touch each other. Crowded plants trap humidity and encourage mold.
Many cultivators also use pre-filters on air inlets to keep dust and pests out. For professional or commercial setups, cleanroom curtains or dedicated drying tents ensure consistent airflow and contamination control.
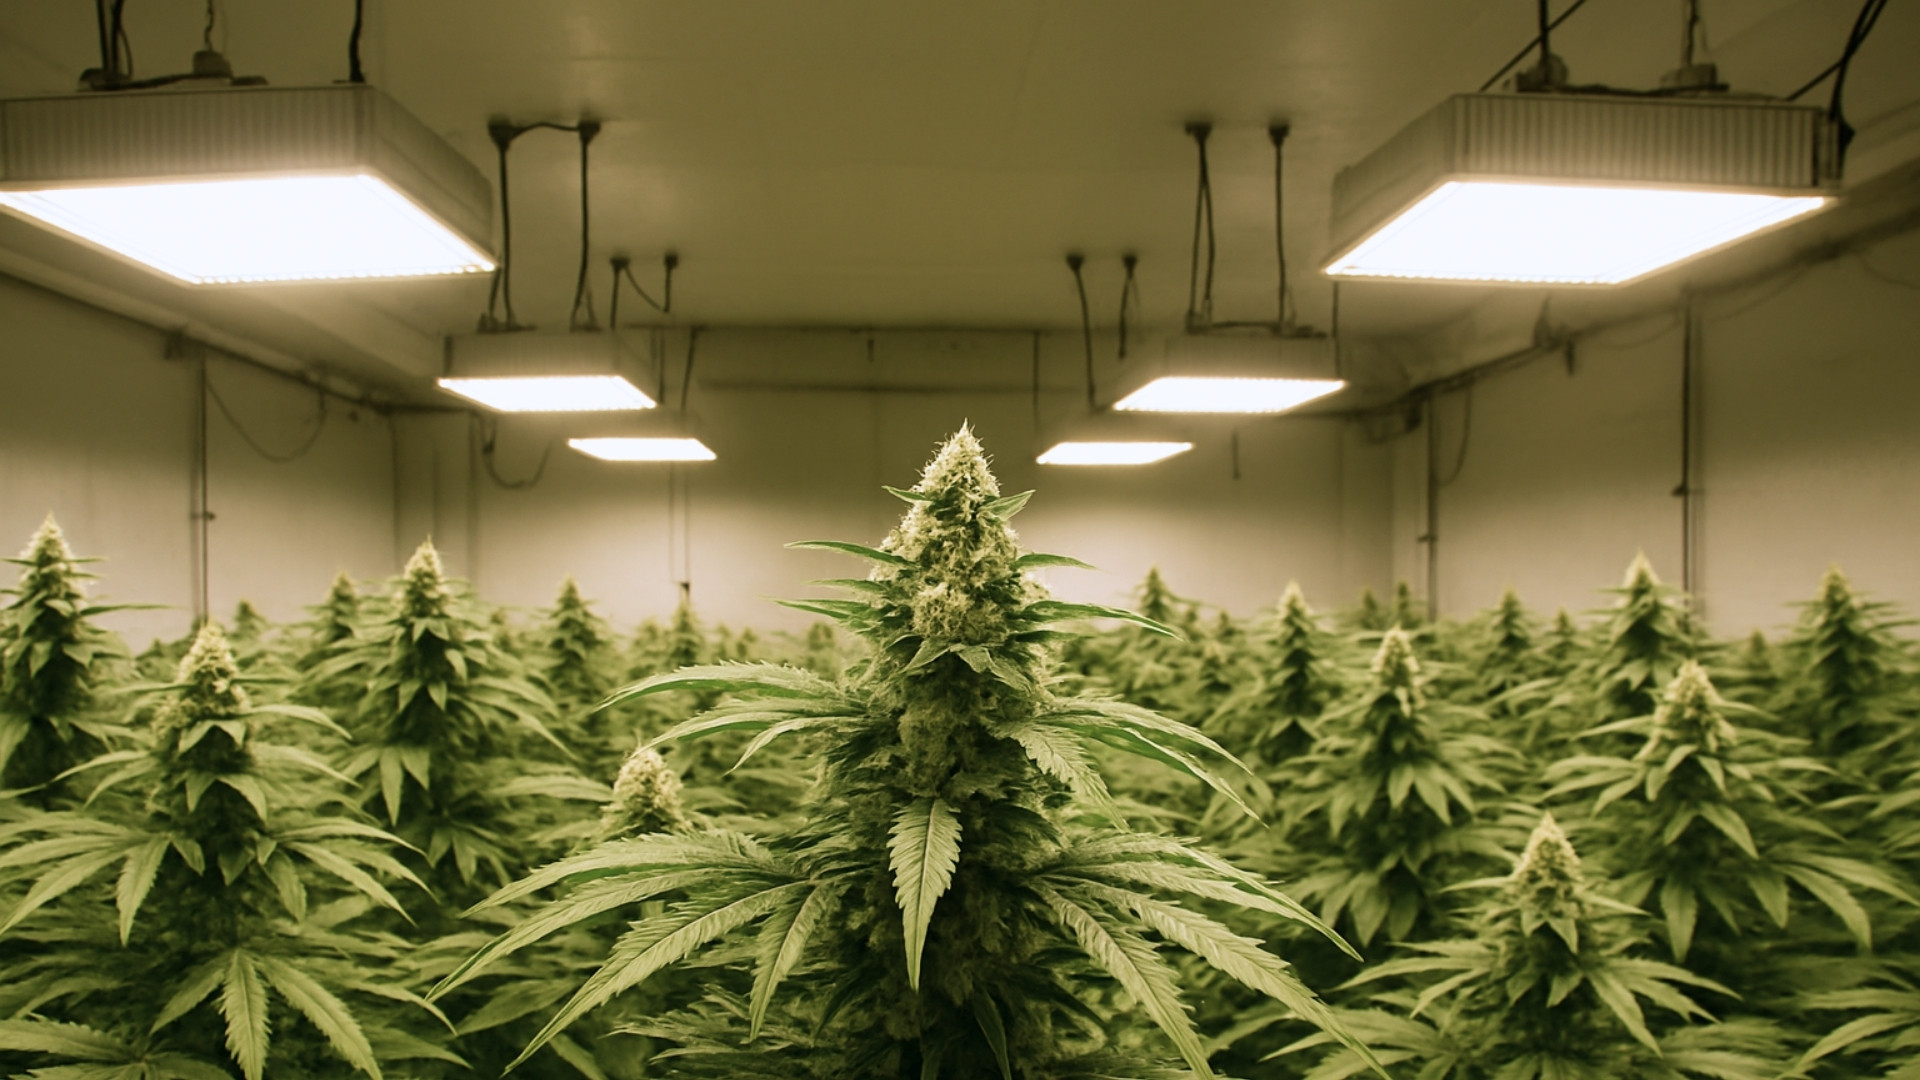
Once the room is ready, hang your branches upside down using stainless steel hooks, wire lines, or mesh racks. If you’re drying whole plants, remove only the large fan leaves to slow the process slightly.
Environmental Targets and Room Setup
Every top-tier cultivation guide, from Royal Queen Seeds to Leafly to Grove Bags, agrees that temperature, humidity, and airflow make or break the drying process.
Ideal Temperature
Keep your room between 60°F and 70°F (15–21°C).
- Cooler air (closer to 60°F) slows drying, which improves terpene retention and flavor.
- Higher temperatures (above 72°F) dry too fast, leading to brittle buds and muted aroma.
Relative Humidity (RH)
Maintain RH between 45–55% throughout the drying period.
- At 45%, the process moves faster but risks harshness.
- At 55%, drying slows down, preserving aromatic compounds.
- Never let RH climb above 60% for more than a few hours; this encourages mold and botrytis development.
A digital humidistat linked to a dehumidifier or humidifier helps maintain balance automatically. In most climates, humidity tends to rise during the first three days as plants release water, then stabilize.
Airflow and Ventilation
Proper airflow prevents moisture buildup, especially inside dense buds. Position oscillating fans on low settings to keep air moving gently below or beside the hanging plants, not directly on them. Use a small exhaust fan to exchange room air with fresh filtered air 2–3 times per hour.
Pro tip: Run dehumidifiers and fans 24/7 during drying, but minimize turbulence. Consistent airflow is more important than intensity.
Duration
Most batches dry in 7–14 days, depending on:
- Room size and airflow
- Bud density
- Trimming method (wet trim dries faster; dry trim slower)
- Ambient humidity outside the room
In professional drying facilities, airflow and humidity are carefully balanced to achieve around 0.5%–1% weight loss per hour during the first few days, tapering off as buds approach target moisture.
How to Check Progress
- On days 5–7, bend a small stem. If it folds but doesn’t snap, it’s halfway there.
- By day 10–12, the stem should snap cleanly.
- Buds should feel dry on the outside but still springy when squeezed.
- A sample jar should read 58–62% RH after being sealed for 2 hours, a sign it’s ready to cure.
Remember: the goal isn’t to dry fast. It’s too dry evenly.
Need to monitor drying conditions remotely? PlanaCan lets you record humidity and temperature data in real time and manage drying schedules across multiple rooms or strains from one dashboard. Schedule a free call today.
Methods: Hang-Dry vs Rack-Dry vs Chamber
The drying method you choose depends on your available space, climate, and the scale of your harvest. While the end goal, slow, even moisture removal, is the same, the method affects drying speed, consistency, and aroma.
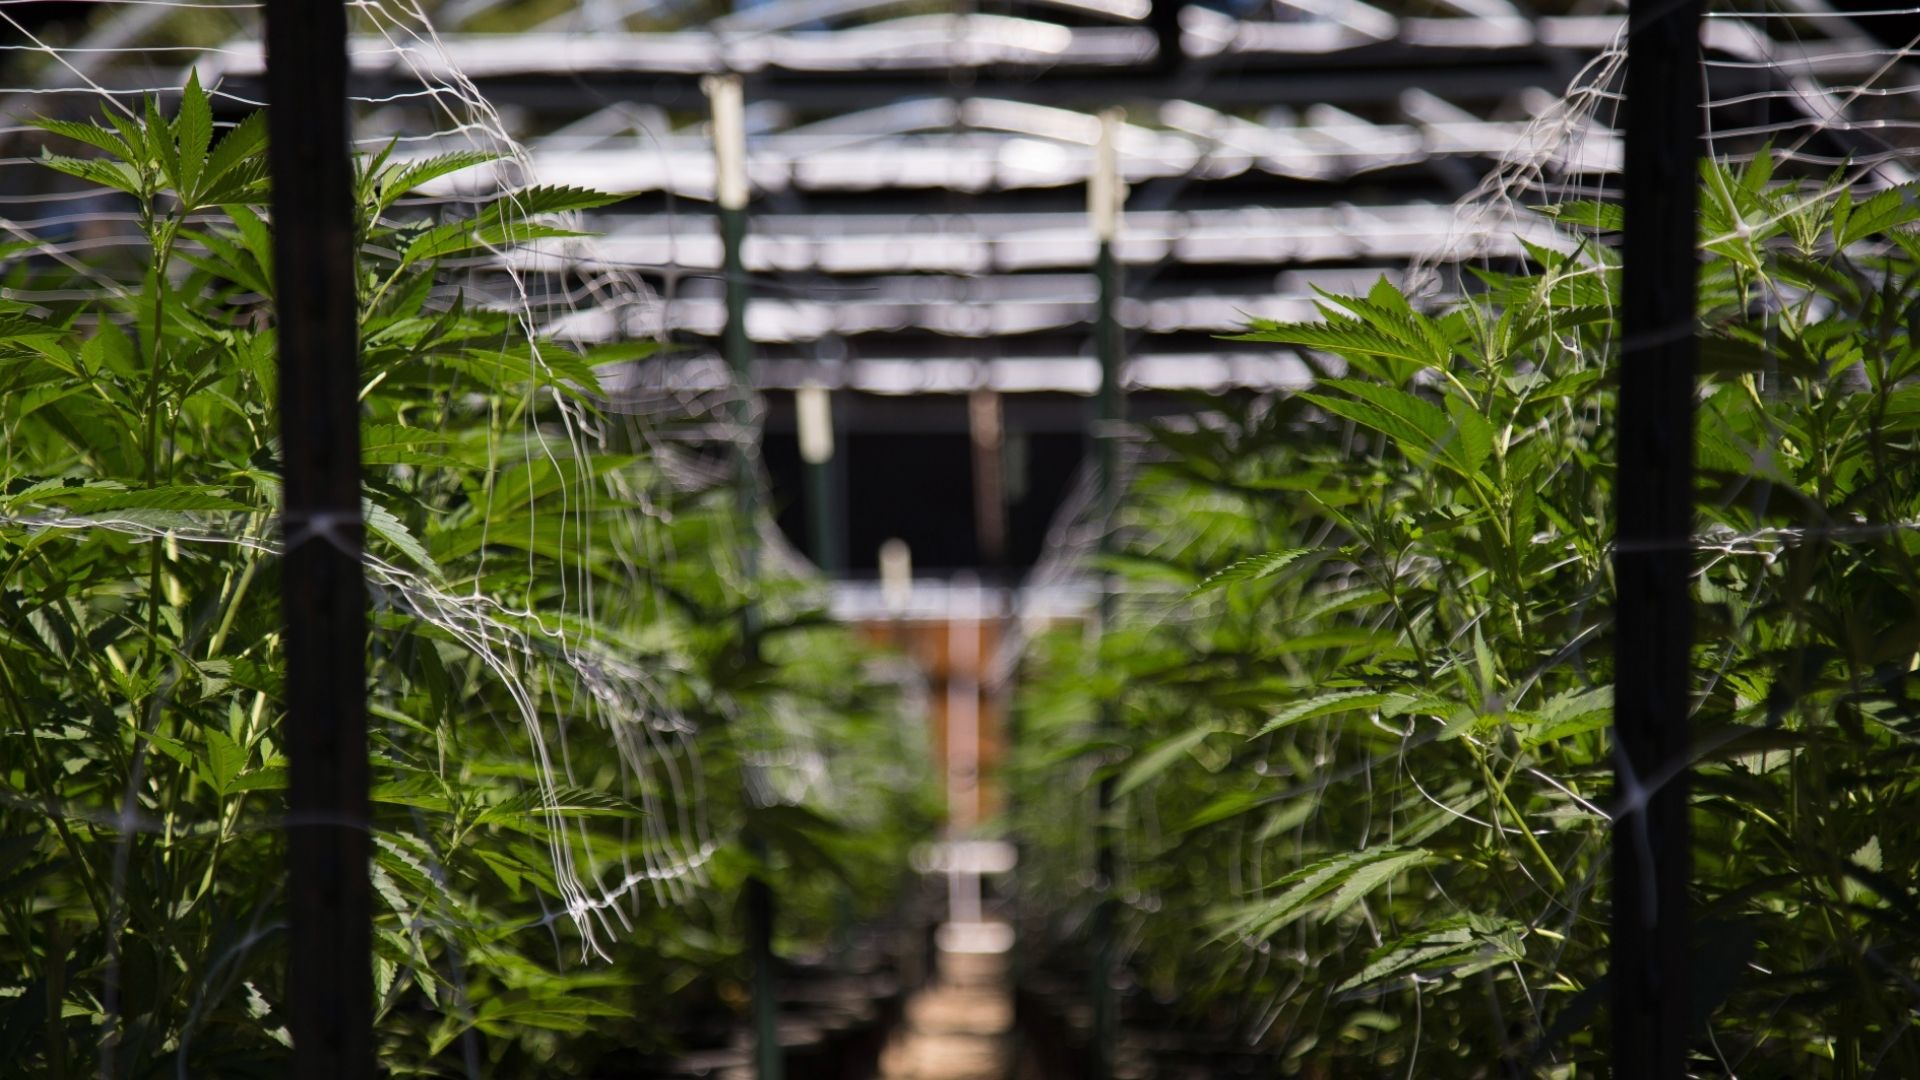
1. Hang-Drying Whole Plants or Branches
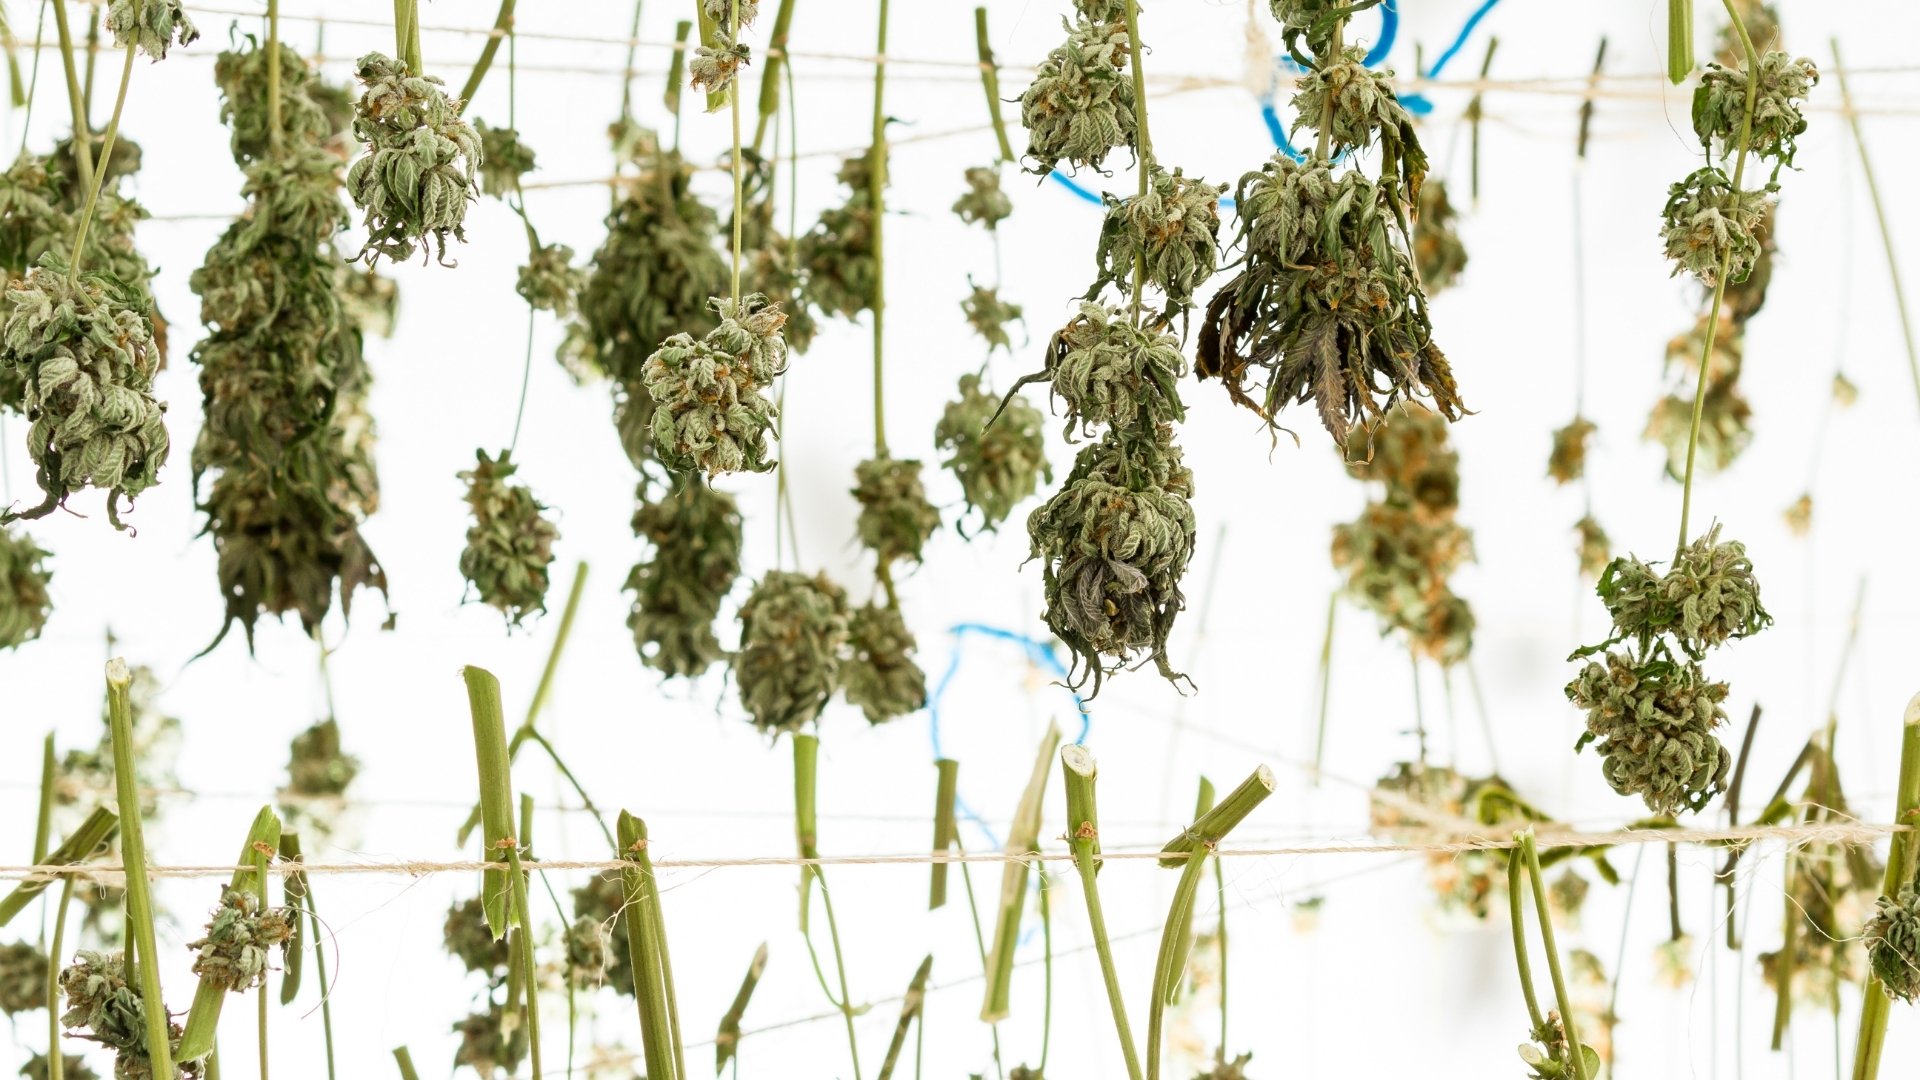
This is the most traditional and widely used technique. You cut whole plants or large branches and hang them upside down in a dark, climate-controlled room. The leaves act as a natural humidity buffer, slowing evaporation.
Best for:
- Small to medium harvests
- Arid or moderately dry climates
- Growers aiming for maximum flavor retention
Advantages:
- Encourages gradual drying and even moisture migration
- Reduces risk of over-drying in low-humidity areas
- Maintains bud shape and trichome integrity
Challenges:
- Requires a larger space and proper airflow spacing
- It may take longer in humid conditions
To get uniform results, space branches several inches apart. Make sure no buds touch each other and that airflow reaches all sides. Whole-plant hangs typically dry in 10–14 days under standard 60°F/55% RH conditions.
2. Rack-Drying or Wet-Bucking

In this method, you remove buds from branches (a process called bucking) before drying and spread them evenly on mesh racks or trays. This increases surface area, speeding up evaporation. It’s commonly paired with wet trimming.
Best for:
- Humid or coastal climates
- Large harvests require faster turnover
Advantages:
- Faster drying, typically 5–9 days
- Compact space usage
- Easier to manage airflow and humidity
Challenges:
- Higher risk of uneven drying or brittle buds if airflow is too strong
- Requires regular bud rotation to prevent flat spots
- Exposes trichomes to more handling and air exposure
Professional growers often use stacked stainless-steel mesh racks and position circulating fans beneath them to ensure steady airflow.
3. Drying Chambers
Drying chambers or sealed rooms use integrated temperature, humidity, and airflow control systems. They’re ideal for commercial or high-value crops where precision and throughput matter most.
Best for:
- Commercial-scale operations
- Variable outdoor climates
- Strain-specific drying control
Advantages:
- Stable environmental control 24/7
- Consistent batch-to-batch quality
- Automation options for data logging and humidity feedback loops
Challenges:
- High setup cost
- Requires maintenance and calibration
Some advanced chambers use variable air volume systems or integrated dehumidification coils to manage airflow precisely, for smaller craft growers, even a modified tent with a hygrometer and adjustable vents can mimic this approach at a fraction of the cost.
Climate Playbooks: Humid vs Arid Regions
The drying environment directly influences your workflow. Growers in humid regions face the constant battle against mold, while those in arid zones struggle to slow evaporation enough to avoid harsh smoke. Your adjustments should focus on humidity control and drying pace.
Drying in Humid Climates
Challenges:
High ambient humidity slows evaporation and increases mold risk, especially in dense flowers. Temperatures above 70°F combined with humidity above 60% can quickly spoil your crop.
Solution:
- Keep RH around 45–50% using a powerful dehumidifier.
- Use multiple small fans instead of one large fan to ensure even air movement.
- Space branches wider apart than usual.
- Increase air exchanges by running exhaust fans longer, but keep incoming air filtered.
- Avoid large leaf canopy or whole-plant hangs, use wet trim or bucked branches to reduce trapped moisture.
In highly humid regions, a drying cycle may still take 10–14 days, but your goal is to maintain a slow, steady moisture loss curve rather than drying unevenly or too fast.
Drying in Arid Climates
Challenges:
Low humidity and warm air make drying too rapid, leading to harsh, brittle buds and terpene loss.
Solution:
- Keep RH between 50–55% using a humidifier or by leaving some fan leaves attached.
- Opt for whole-plant hang-drying to slow down the rate of evaporation.
- Use indirect airflow only; avoid pointing fans directly at the canopy.
- Maintain room temperature near the lower limit, around 60°F if possible.
- Close the room more tightly during the first few days to retain some moisture.
In these conditions, the process usually completes in 7–10 days. The slower the dry, the smoother the final smoke, and the better the flavor retention.
Tip: Watch the Curve, Not the Calendar
Drying is about consistency over time, not the number of days. In both humid and arid conditions, the best indicator is the internal moisture balance; outer buds should feel crisp while stems still bend slightly. Once stems start to snap cleanly, the buds are ready for curing.
Tracking temperature and humidity daily helps you catch problems early. PlanaCan lets you log drying data, assign check tasks to team members, and compare results across different batches or climates, all in one dashboard. Schedule a free call today.
When Is Drying Complete
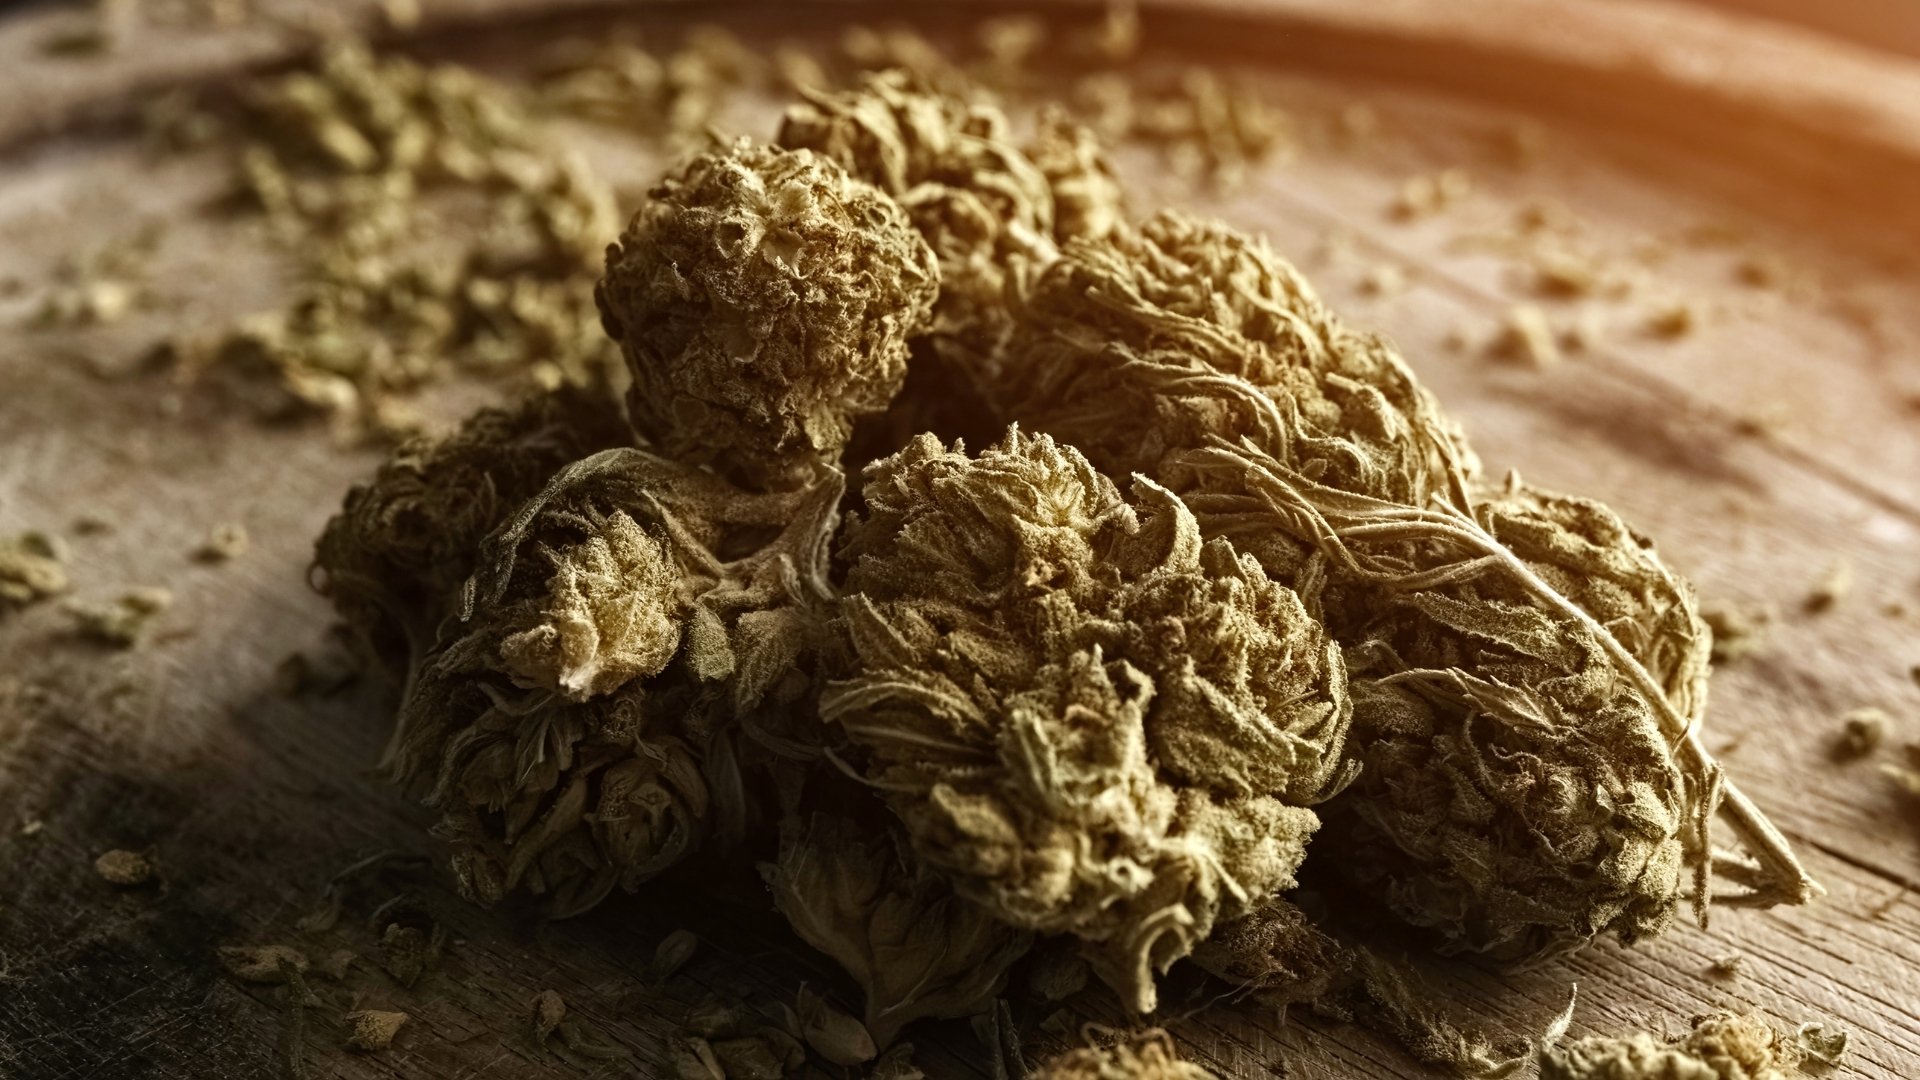
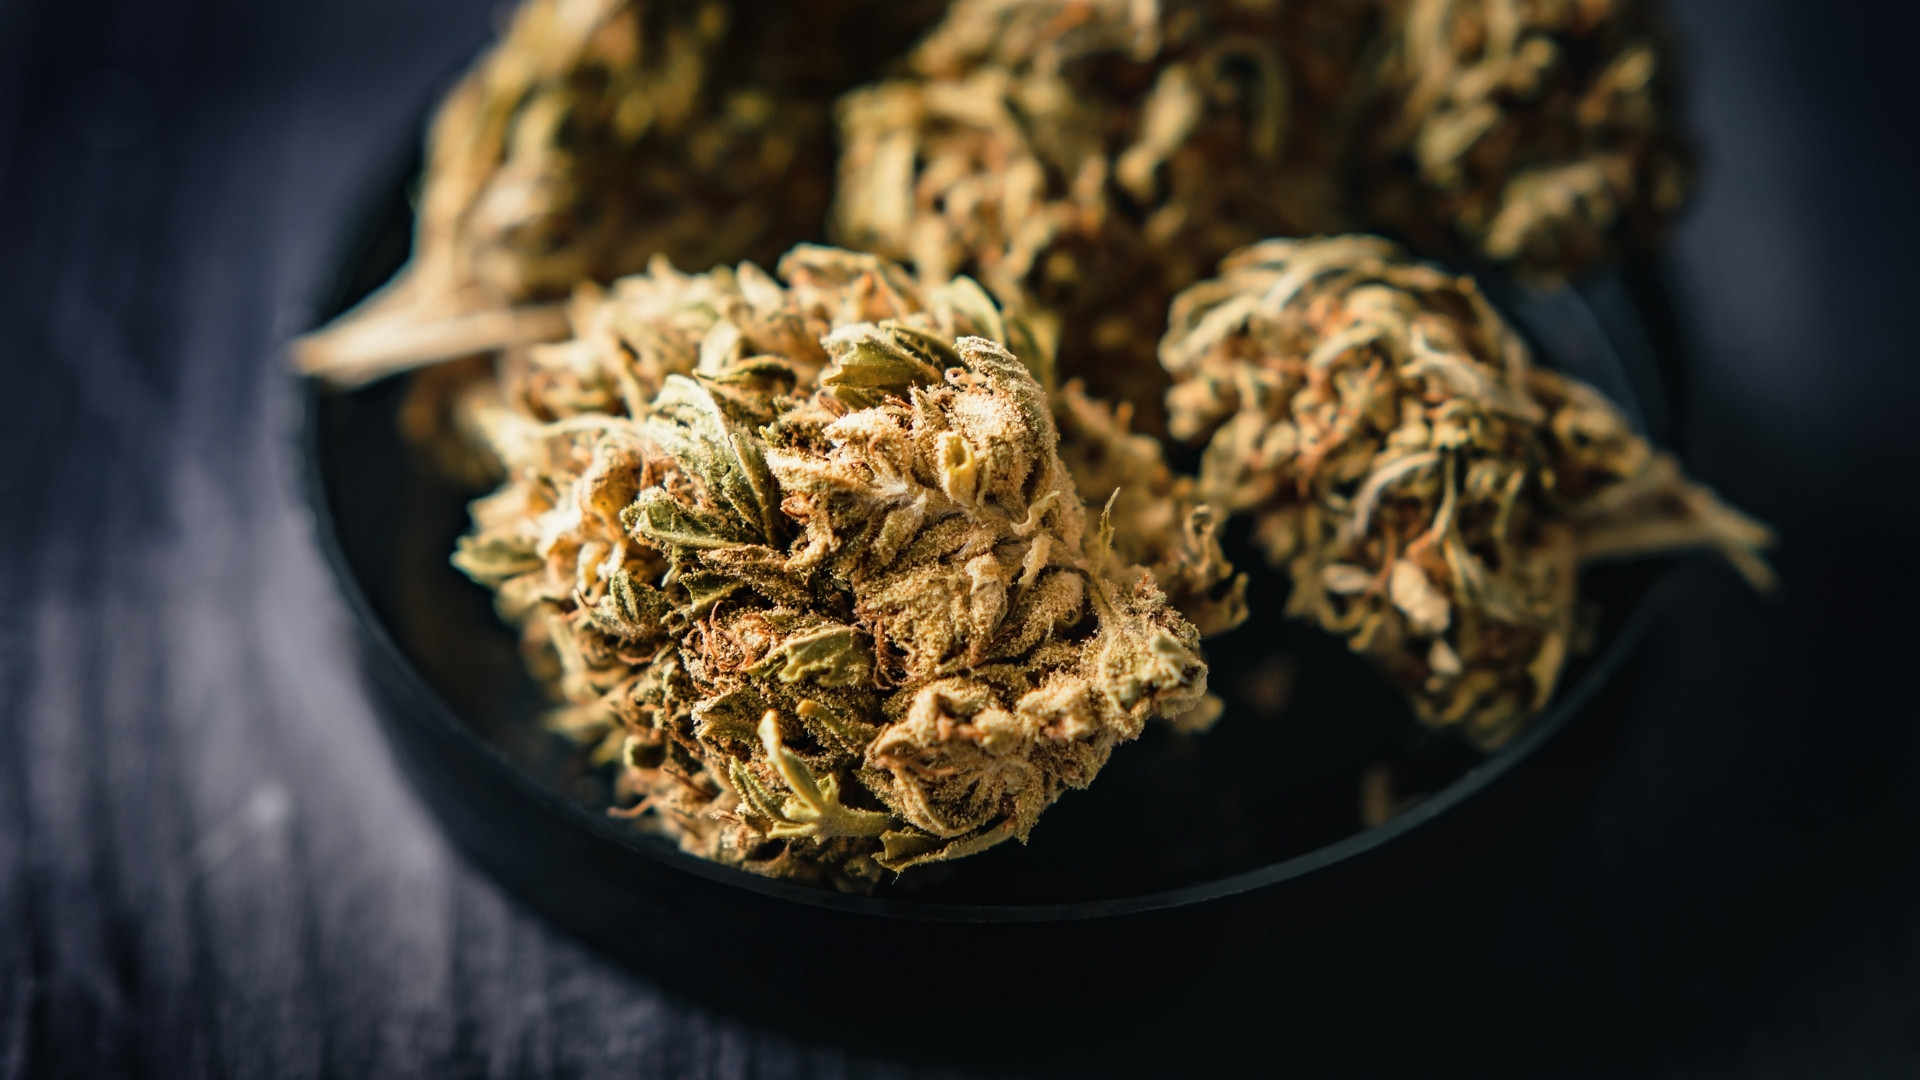
Knowing when your cannabis is properly dried is both an art and a science. The goal is to reach a moisture level where buds are dry enough to prevent mold but still retain internal softness for curing. Rushing this step is the most common mistake new growers make.
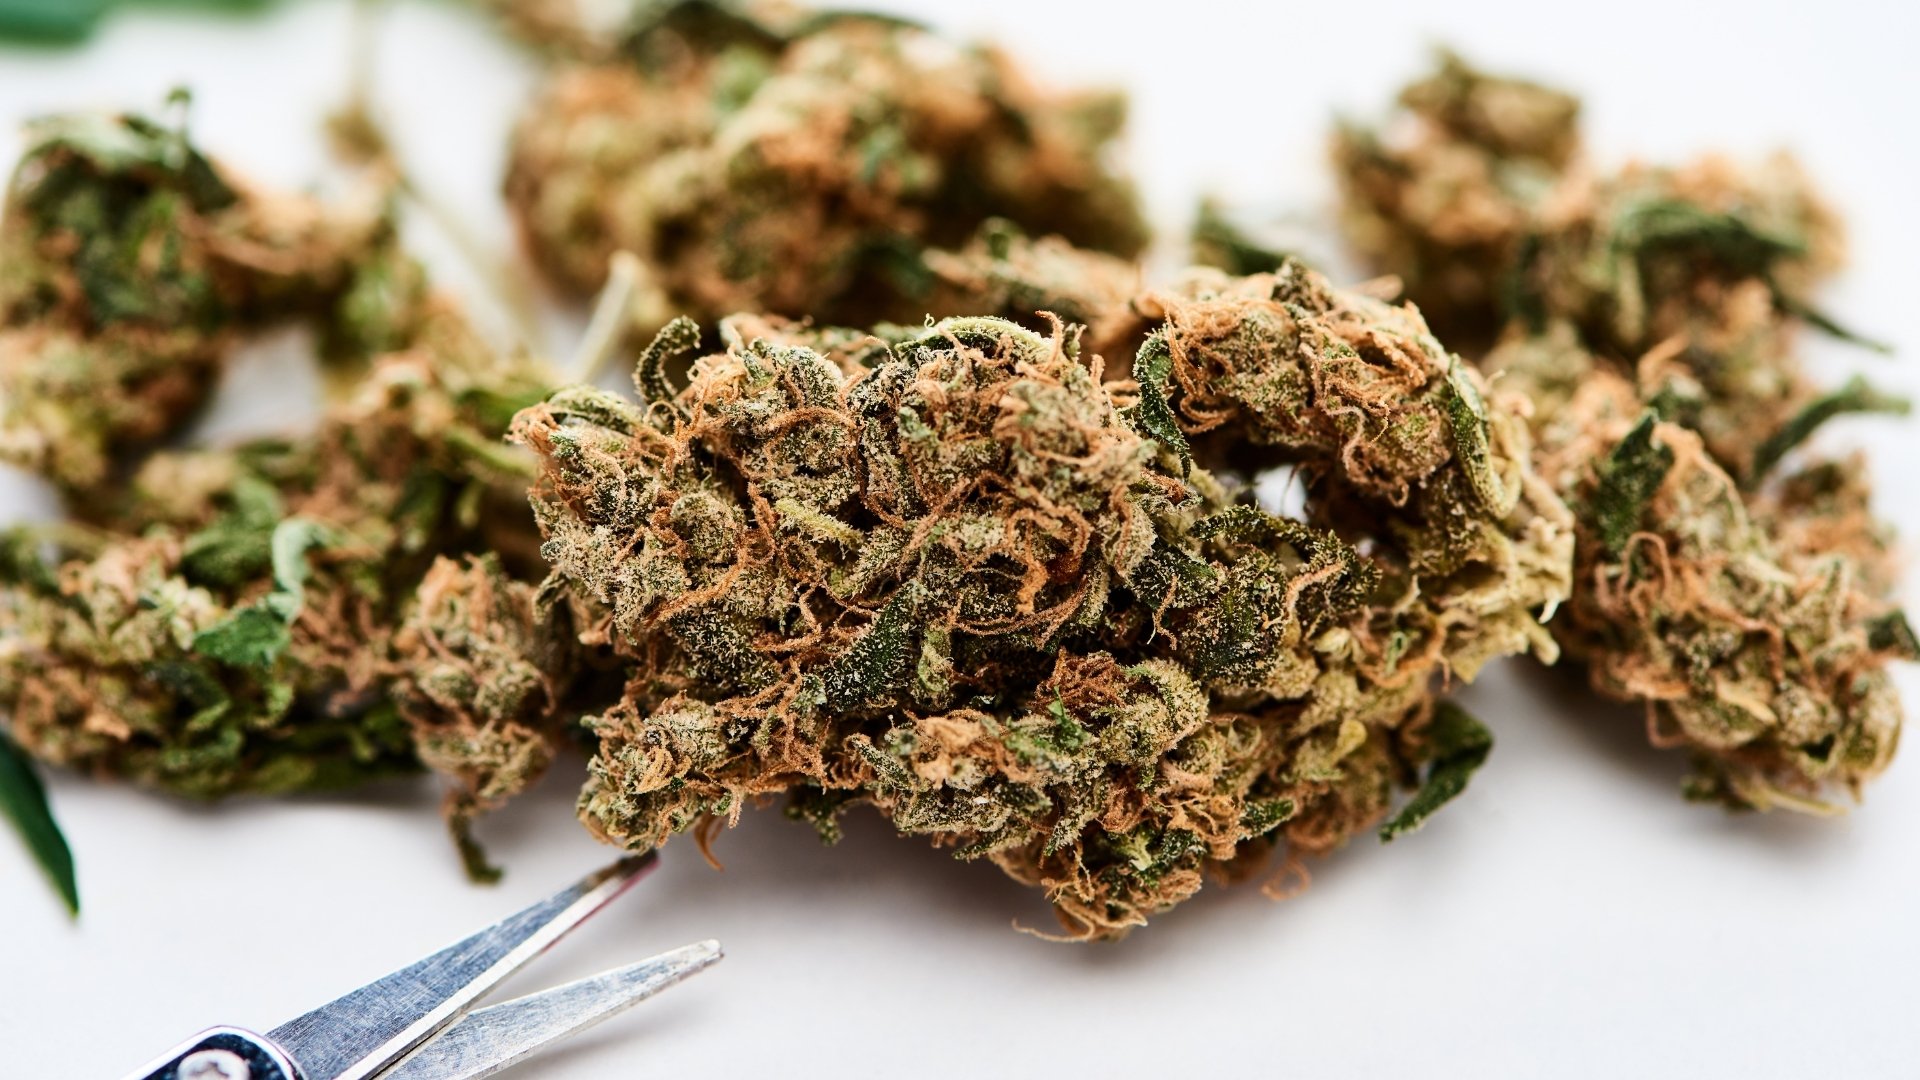
The Physical Signs
The easiest way to check dryness is by feel and sound:
- Stem test: Bend a small stem; if it snaps cleanly instead of folding, it’s ready for curing.
- Touch test: Outer buds should feel dry to the touch but still slightly spongy inside when squeezed. If they crumble, you’ve gone too far.
- Aroma check: Properly dried buds smell clean and aromatic, not grassy or sharp. A hay-like odor means chlorophyll hasn’t finished breaking down, likely due to fast drying.
The Instrument Check
For more accuracy, you can use humidity or water activity measurements.
1. Hygrometer test (the “jar method”)
Place a small batch of buds into an airtight jar with a mini hygrometer. After two hours, check the reading:
- 58–62% RH → Perfect for curing
- 63–65% RH → Needs more drying
- Below 55% RH → Slightly over-dried (rehydrate carefully during cure)
2. Water Activity (a_w)
Professional cultivators measure water activity, which indicates how much moisture is available for microbial growth.
- Safe range: 0.55–0.65 a_w
Below 0.55, buds become brittle and lose aroma. Above 0.70, mold risk rises sharply.
This scientific metric is increasingly used for compliance testing and long-term storage quality assurance. Handheld water-activity meters or lab services can help large-scale growers ensure consistency.
The Time Frame
For most small- to mid-scale setups, drying takes:
- 7–10 days for trimmed or rack-dried buds
- 10–14 days for whole-plant hang dries
Bud density, temperature, and humidity all influence this range. Remember, the goal isn’t speed, it’s uniform moisture migration from the core to the surface.
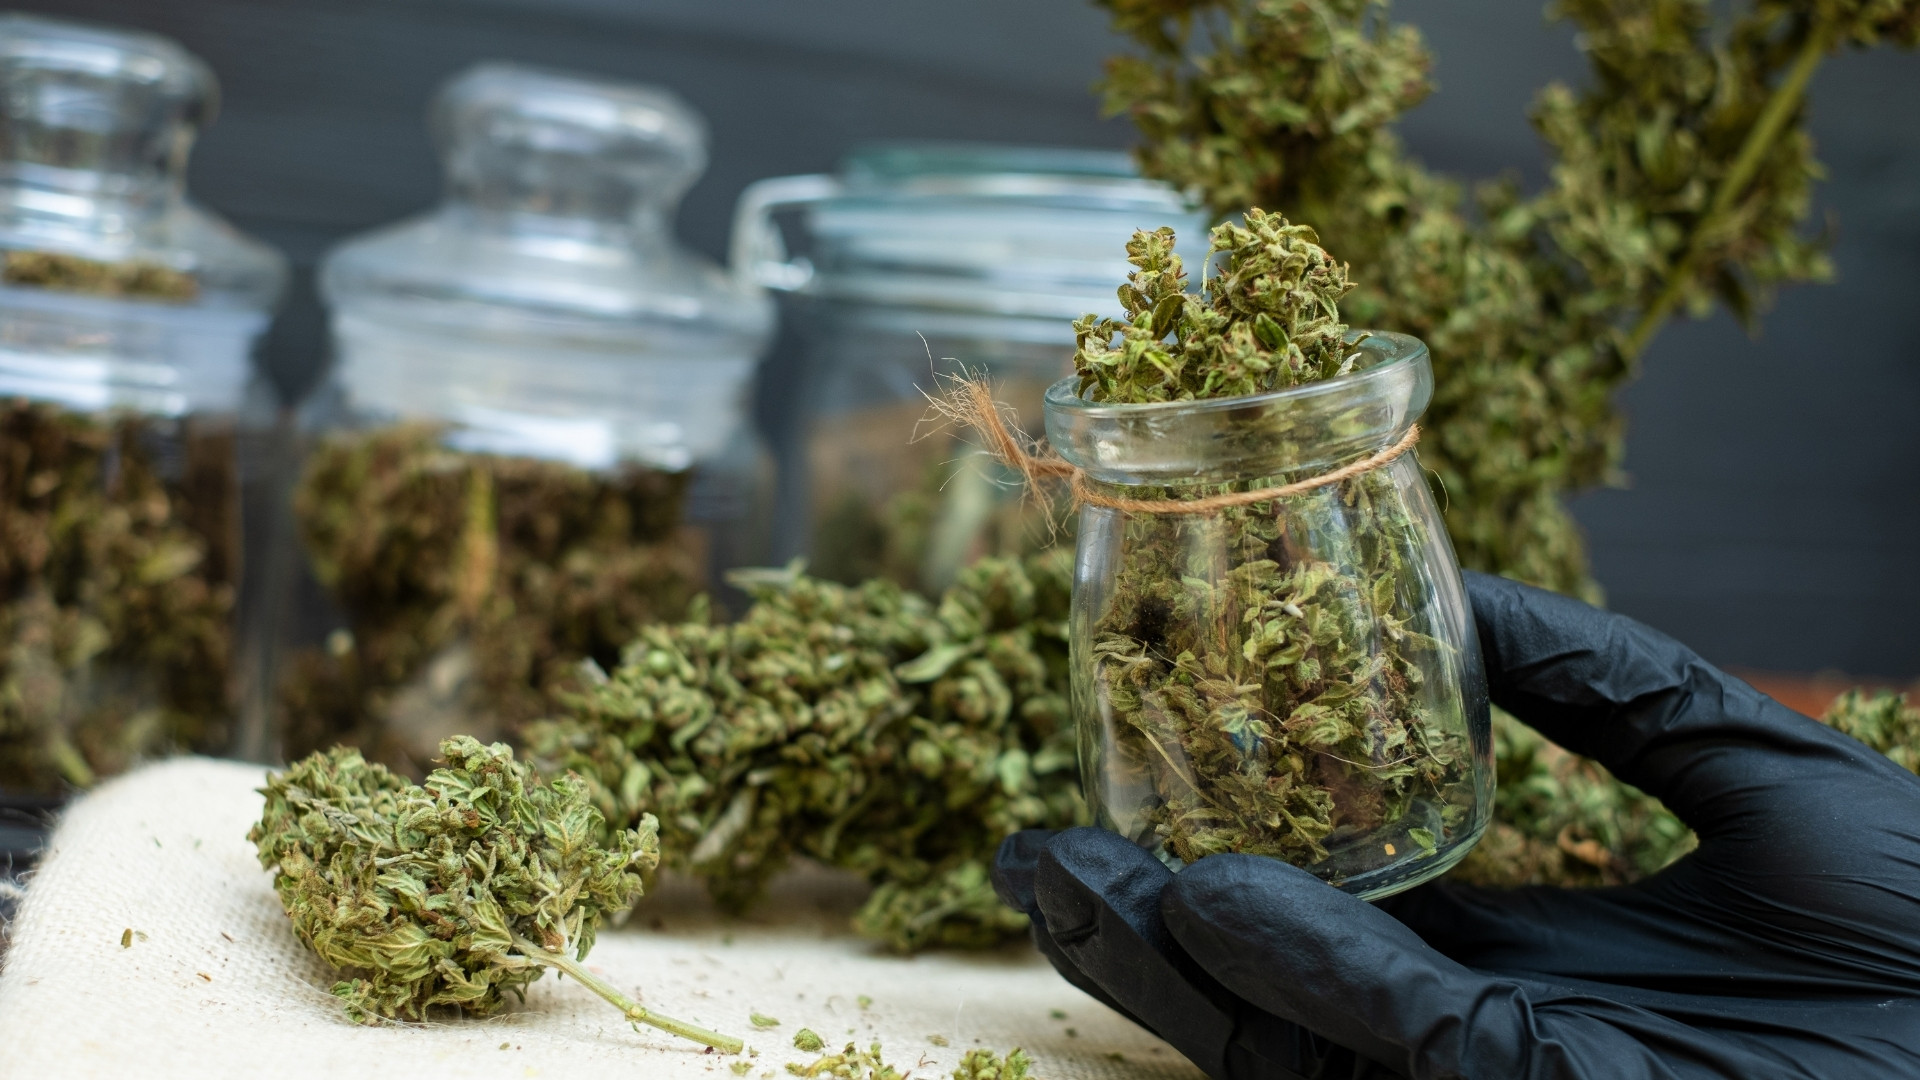
Curing Fundamentals and Container Choices
Drying removes free moisture; curing stabilizes internal moisture and refines aroma. During curing, remaining sugars and chlorophyll break down, and terpenes redistribute evenly through the flower. Proper curing enhances flavor, potency, and smoothness, and determines whether your product will store well for months.
The Start of Curing
Once drying is complete (stems snap, outer buds are firm), transfer your buds to airtight containers.
- Use glass jars for small batches.
- Use engineered curing bags such as Grove Bags’ TerpLoc™ for larger or commercial batches.
Each container should be filled about 75% full, leaving room for air exchange. Label each jar with strain name, harvest date, and drying duration.
The Right Conditions
- Temperature: 60–70°F (15–21°C)
- Humidity: 58–62% RH inside the container
- Darkness: Store in a dark cabinet or room to prevent light degradation.
Place a small digital hygrometer inside each container to monitor humidity. If the RH climbs above 65%, open the container (“burp” it) for 10–15 minutes to release moisture. If it falls below 55%, add a humidity control pack.
Burping Schedule
Week 1: Open containers once or twice daily for 10–15 minutes.
Week 2: Once every two to three days.
Week 3 and beyond: Once per week until the aroma stabilizes and buds feel evenly dry.
A properly cured batch will have a balanced, smooth scent that reflects its terpene profile, citrusy, earthy, fruity, or piney, depending on strain. Harshness or a grassy smell indicates chlorophyll is still breaking down; extend the cure if needed.
Container Comparisons
Many growers now favor Grove Bags or similar breathable curing bags because they simplify humidity management. They’re designed to maintain an internal RH equilibrium without manual intervention, reducing labor while preserving terpenes.
Duration of Cure
A minimum of 2 weeks is required for a noticeable improvement in aroma and smoothness. Most connoisseurs extend curing to 4–8 weeks for full flavor development.
Longer cures, up to 12 weeks, continue to refine terpene profiles, provided humidity remains stable and no mold develops.
Managing multiple harvest batches through drying and curing can be data-heavy. With PlanaCan, you can track batch conditions, record humidity logs, and standardize curing times across strains for consistent quality control. Schedule a free call today.
Advanced and Commercial Drying Options

While traditional hang-drying works perfectly for small to mid-scale growers, commercial cultivators often need greater consistency, speed, and environmental control. Several advanced drying techniques have emerged to meet those needs.
1. Low-and-Slow (Refrigerator or Cold Room Drying)
Buds are dried at low temperatures (45–50°F) and moderate humidity (55–60%) in a cold environment such as a specialized fridge or cold room. This slows the process dramatically, often extending drying to 3–4 weeks.
Benefits:
- Preserves terpenes and cannabinoids better than warm-air drying.
- Reduces oxidation and terpene loss.
- Minimizes microbial growth due to lower temperature.
Drawbacks:
- Requires precise humidity control.
- Takes longer, which can tie up space.
- Needs careful airflow to prevent condensation.
This technique is popular among small craft growers who prioritize aroma and flavor above throughput.
2. Freeze-Drying (Lyophilization)
Freeze-drying removes water from frozen cannabis using a vacuum that sublimates ice directly into vapor. Drying is complete within 12–24 hours instead of days.
Benefits:
- Extremely fast and preserves terpenes exceptionally well.
- Maintains color, trichome structure, and potency.
- Ideal for extracts and concentrates.
Drawbacks:
- High equipment cost.
- It can create an overly crisp texture in the lower if not cured afterward.
- Requires laboratory-grade control systems.
Most commercial producers use freeze-drying for live resin or fresh-frozen extracts, not for traditional smokable flower. However, hybrid systems that combine partial freeze-drying with short ambient curing are being tested to balance speed and quality.
3. Controlled-Environment Drying Chambers
Large producers increasingly use dedicated drying chambers with automated sensors and integrated HVAC systems. These chambers maintain perfect temperature and humidity consistency while logging every parameter for compliance and quality tracking.
Advantages:
- Scalable and repeatable across batches.
- Continuous monitoring reduces human error.
- Enables data-driven refinement of drying profiles.
Such chambers are part of standard Good Manufacturing Practice (GMP) workflows in licensed cultivation facilities, ensuring consistent terpene retention and microbial safety across thousands of pounds of product.
Troubleshooting Common Drying Problems
Even with the best setup, issues can arise. Recognizing the symptoms early can save your harvest.
1. Dried Too Fast
Symptoms: Harsh smoke, brittle texture, grassy smell.
Causes: Low humidity (below 40%) or high temperature (above 75°F).
Fix:
- Rehydrate slowly by placing buds in sealed containers with 62% humidity packs.
- Extend curing time to at least 4 weeks to restore moisture balance.
2. Too Slow or Mold Risk
Symptoms: Musty smell, soft or sticky buds after 10+ days.
Causes: High RH (above 60%) or poor airflow.
Fix:
- Increase fan speed slightly and lower RH to 45–50%.
- Space branches farther apart.
- Check for early mold spots and remove affected material immediately.
3. Flat Aroma or Loss of Flavor
Symptoms: Bland scent despite smooth texture.
Causes: Over-drying or too much light/air exposure.
Fix:
- Use airtight containers and store in the dark.
- Extend curing with fresh humidity control packs.
- Consider lowering drying temperature next harvest.
4. Uneven Drying
Symptoms: Outer buds crisp, but inner stems still moist.
Causes: Direct airflow or inconsistent spacing.
Fix:
- Rotate buds daily during drying.
- Adjust fan placement for indirect, even circulation.
- Ensure consistent branch thickness across hanging lines.
5. Mold Development
Symptoms: White, gray, or fuzzy patches; ammonia smell.
Causes: RH above 65%, lack of air movement, or contamination.
Fix:
- Discard affected buds immediately; old buds cannot be salvaged.
- Sanitize the room and restart the drying cycle at controlled conditions.
- Use HEPA filtration or intake filters for prevention.
Monitoring drying rooms manually is time-consuming. With PlanaCan, you can automate drying checklists, track humidity alerts, and log progress in real time for every harvest batch. Schedule a free call today.
Conclusion
Drying is not just about removing water, it’s about preserving everything you worked for during the grow. Patience, precision, and consistency make the difference between harsh, dull flowers and smooth, flavorful buds that command premium quality.
By keeping your environment cool, dark, and balanced in humidity, you allow cannabinoids and terpenes to mature gracefully. Transition smoothly into curing at 58–62% RH, and your final product will hold its aroma, potency, and smooth burn for months to come.
If you manage multiple harvests or drying rooms, consistent scheduling and data tracking are key.
PlanaCan helps commercial and craft growers plan, monitor, and analyze every stage of drying and curing in one intuitive platform.
Get started today!
FAQs About Drying Marijuana
1. What temperature and humidity should I use to dry cannabis?
Aim for 60–70°F temperature and 45–55% RH. Adjust slightly based on local climate. Consistency is more important than precision.
2. How long does marijuana take to dry before curing?
Usually 7–14 days, depending on bud density, trimming method, and climate. Dry slowly for best quality.
3. Should I dry in the dark?
Yes. Light breaks down THC and terpenes. Keep the drying room completely dark except for brief inspection.
4. Can I use humidity packs during drying?
No. They are designed for curing and storage. Use dehumidifiers or humidifiers to control drying-room humidity instead.
5. Are Grove Bags better than jars for curing?
Both work well. Grove Bags self-regulate humidity and require less maintenance, while jars are ideal for smaller personal grows.
6. What is water activity, and why does it matter?
Water activity (a_w) measures how much water is available for microbial growth. The safe range for dried cannabis is 0.55–0.65, below mold risk but still fresh enough to cure and store safely.